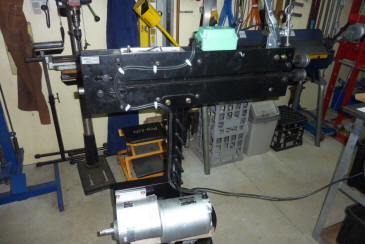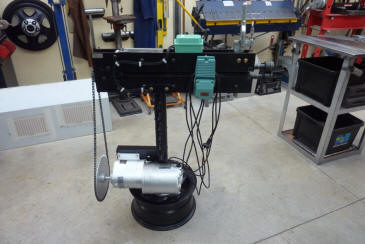

So only the winding wires travel to the forward-stop-reverse switch and back down. Power leads runs to the foot switch and then to the motor. There are other ways of wiring this and using a single phase change over switch changes it again. Now I knew that 1.7 rpm was going to be too slow for most of the work. The only other chain sprockets found were either the same 16 tooth that was on the gearbox, or a couple of 60 tooth ones. Timing the gearbox showed it was closer to 1.8 rpm, so running the 60 tooth gear would bring it up to 6.75 rpm with the original 16 tooth sprocket on the end of the bead roller shaft.
Looking for a chain for it I discovered it was the same as some unused leftover chain from my electric garage door openers. Putting the two remnants together was just enough to reach. This is the same sized chain as used on single speed push bikes. I was going to throw out this beat up piece of stainless steel that was at my Dads place that he used to mix his concrete on. It was very hard to cut and was I believe from the back splash of a commercial grille and had a fat drain along the bottom. Mostly likely 316 grade.
I hammered out the worst dents and wheeled the stainless so it could be used. I beaded the centre and it felt like a good speed. But going around the small end the bead roller was too fast. So went for my usual daily walk with the dog and some 30 minutes later found this child's BMX thrown out. Being a single speed I knew it would work with my setup.
Stripped the bike down and the chain wheel had 36 teeth which would have it running at 4rpm. Just what I was hoping for for 2" forming dies! :) Drilled it to suit the bottom boss and works great. :) You might also notice that I shifted the drive to the lower shaft instead of the upper that the hand wheel was on. Also meant that I had to make a new slot for the shaft adjustment on the upper shaft instead.
Seemed a waste to throw out the piece I had started to make for the bigger gear, so hammered and wheeled the edge flat again. Folded the straight edges of the chain guard. The reason it looks a little odd is that once mounted, the slotted hole will allow the vertical movement of the gearbox for chain adjustment.
Back of the guard now fitted. I found I had to add another support to the bead roller to stop flex between the stand and the bead roller which altered the chain tension. I mounted the lower guard support of this as well.
Now for the front face of the chain guard. Plenty of bumps in this piece! So glad I had recently stiffened up my English Wheel as it ran great flattening this out. I was not concerned that it stretched the middle as that would be taken up when rolling the bead.
[INDEX]