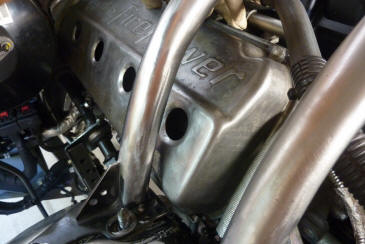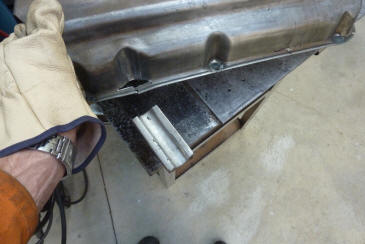

Clearance is a lot better than it looks in this picture. I thought I would match the pressings for the extra two mounting holes. I wanted to see how far I could get. Can see it is pulling the flange in so needs more stretching still, but worried it would get too thin.
I cut and added some material in the end. In the factory pressing dies, the material would have been pulled from the top downwards. So I went with my original plan to cut some slots at the start. Quickly formed it over one of my old blacksmith stakes using the rounded hammer in the background I bought from Peter Tommasini. Can see that it needs about 6mm-1/4" strip added.
A bit more dressing work and it will be done. With the extra bolt hole pressings it looks more like the 426 HEMI covers from the 60's rather than the 50's ones with the script. I wonder if the hole spacing also matches on the later ones?
I could have also done with the later covers corner clearance as well for my steering shaft boot. It was also cut to clear the top of the rear coil pack as can't lift high enough on this side due to the AC lines above it. I want the covers easy to fit and remove without disconnecting anything. The factory half covers also have no end on them. I folded the edge over to remove the sharp edge. I have also welded on the tabs that hold the top of the cover on with the fuel rail screws.
The end of the mounting studs need their thread chased as the nut that is on there is fused to it. The studs are also captive so can't just take them out without removing the whole covers, coils and spark plugs! So I cut the handles off an old die wrench and welded it to a pipe socket. This way I could have different length pipes depending on what clearance I needed. The thread is 6mm with a 1mm pitch. I just ran the die on the three bottom ones that I was using to mount the covers on.
You cannot see once mounted the end cut outs even when looking directly from above. One side done and onto, hopefully, the easier side. Checking clearance to the oil filler neck on the other side. Looks like just bending the flange out of the way should do it.
Plenty of clearance to the tower brace on this side and will just have to bend the dipstick tube out a bit. I tried just pressing the stock hole pressings without flattening it first, and it didn't work as the sides were too vertical. So I carefully hammered them flat first before using the dimple die.
Looks more fitting dimple died as ties in with the other parts I have done in the engine bay. On this side I have to move the centre pressing as well. This is because that pressing is 12mm-1/2" off centre, which worked perfectly on the other side, but on this side it is in the wrong direction. I wont be cutting a vertical slot on that one as the extra material is already there, just in the wrong place.
Can see how I have moved the extra material along like a wave to where I want it. All three now done and a lot quicker than the first try.
This side the only cut outs were for the oil filler neck and to clear the very back of the valve cover. The covers are slightly shorter than the Gen 3 Hemi, but having them sitting level at the front gives much needed room at the firewall end for the harness to run. You have to admit that it looks a lot tidier on the left.
Both sides covered makes the engine look more 'muscular'. Eye level shot.
[Index]