
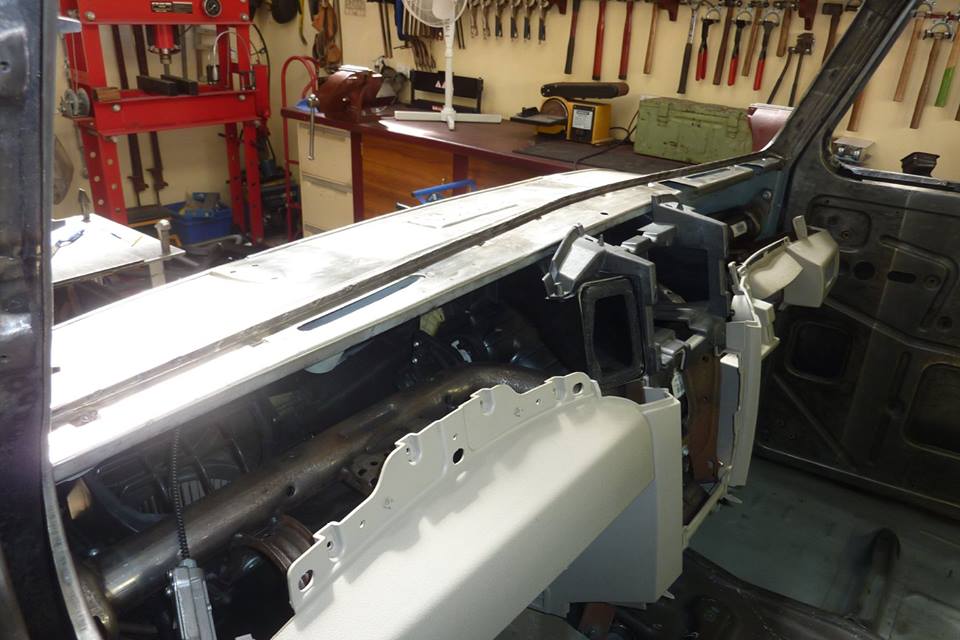
This stake dolly I made from an old wood splitter works really well for adjusting folds more than 90*. Made the centre piece up from the other dash and welded it all in. The stock vent holes were lengthened by 60% and the vents trail fitted. The donor dash will sit down on top of this upper dash piece with the original metal window garnish holding it down in place. This garnish also has a louver pressed in to go over the vent slots which I will have to lengthen to match the new longer ones.

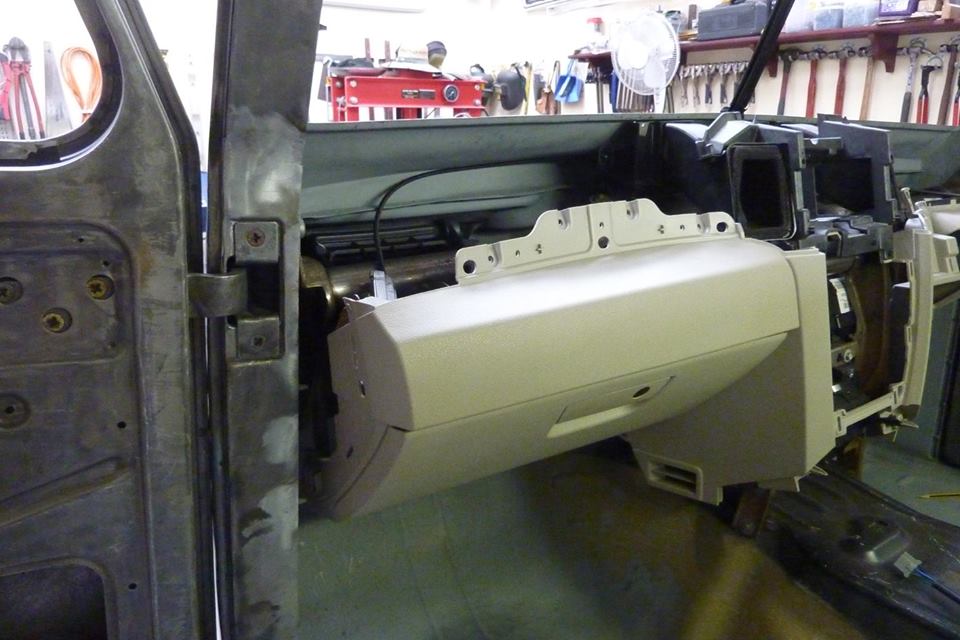
Did a lot of hunting around to fit a suitable wiper system that would fit in the space I had available. There were so many bad reports on the Chinese universal ones that I stayed away from them. This is a Lucas 14W 2 speed setup as used in many English cars like Jaguar, Mini, Triumphs etc. The replacement motor kits are all the same for these. I got this with mounting kit and the internal rack cable from Minimine. Simon has a eBay store but can deal directly too if you email minimine@btconnect.com as well be a bit cheaper. Everything above including a wiring loom pigtail was 80 pounds. You will also need flange nut that holds the tube rack to the rack feral, two wheelboxes, arms and blades which I bought from him as well. I fitted the glove box to see if there was enough room to get the wiper motor in next to it.
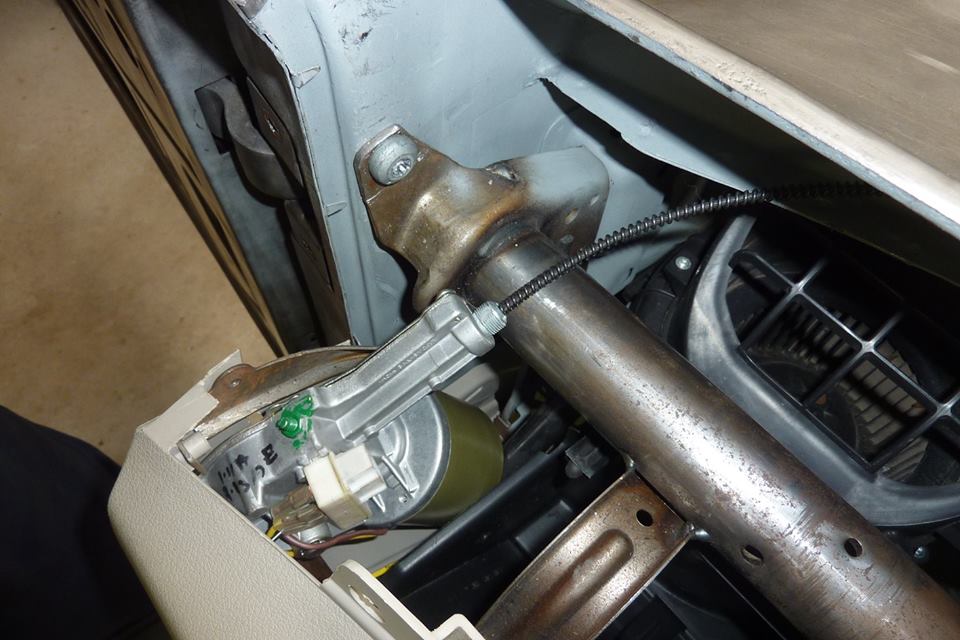
Looks like it may just fit but have to make sure it doesn't touch anything around it as will transfer the noise otherwise when it is running. Made a bracket to weld in between the tube cowl brace and the steel support for the front of the dash.

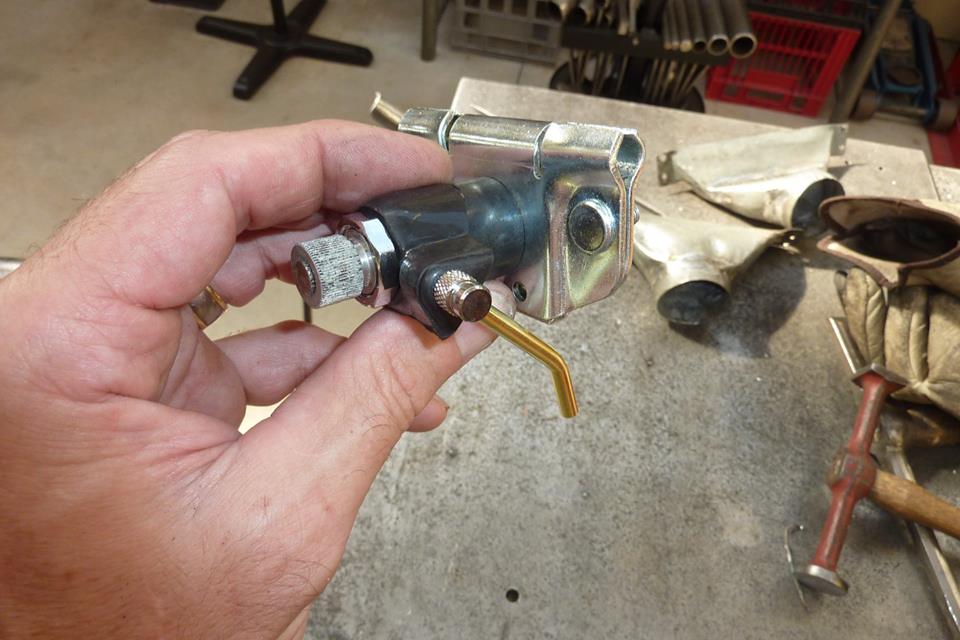
Worked out the best position for the pivot point just by drawing halve the visible glass area on some cardboard and used some stiff wire as a model for the wiper arm and blade. Basically made sure it would just clear the top of the glass when vertical and be near the centre of the windscreen when at the bottom of the sweep. Found these rubber wiper wheelbox bezels that include the washer sprayers as well all in one unit. Saves having them on the cowl or bonnet. They fit Triumph TR4, TR5 and TR6.
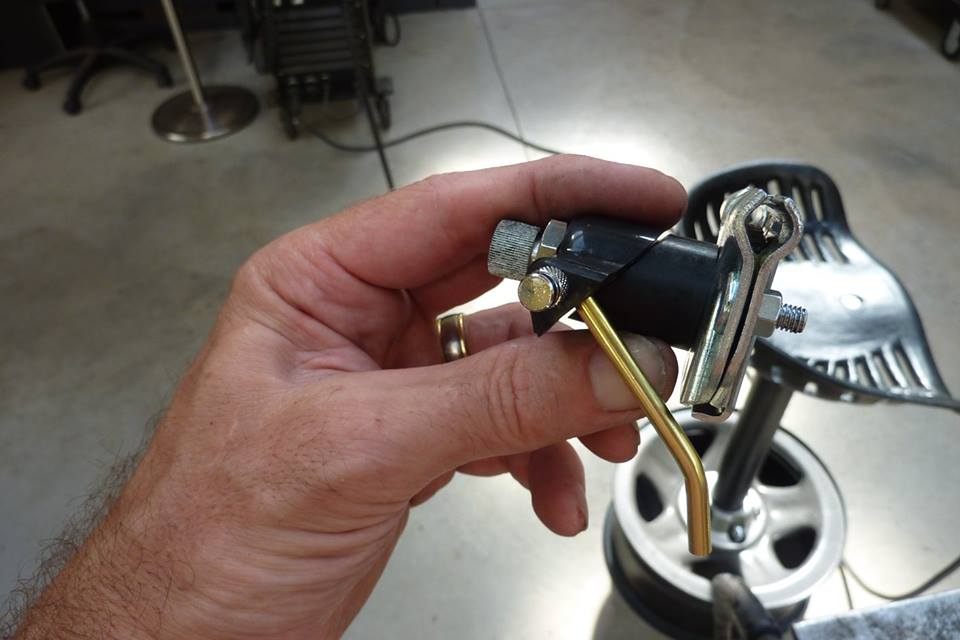
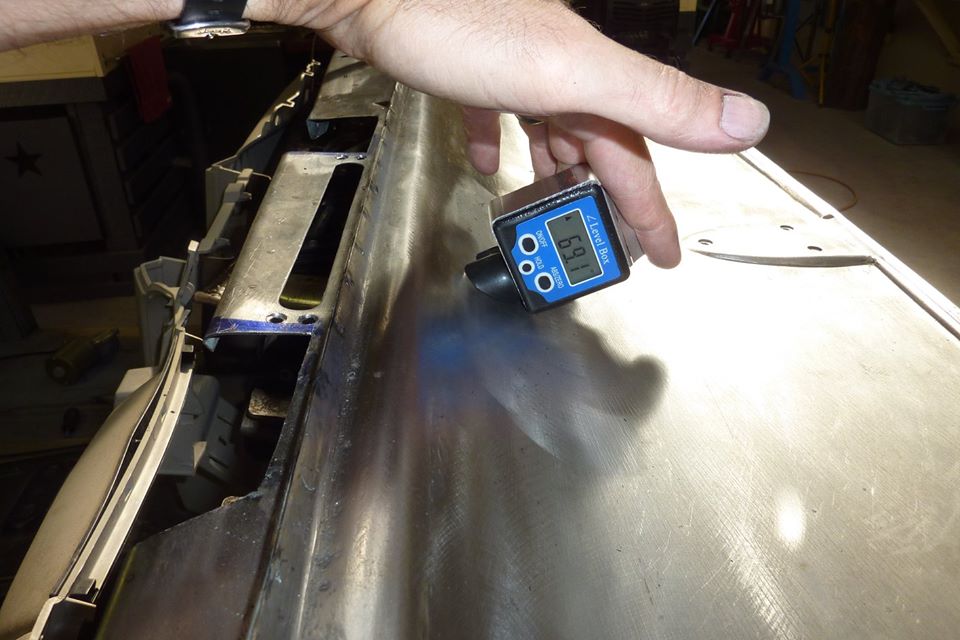
The washer hose connects to the brass tube and it sprays out of the chrome piece on the side. The wheelboxes are Mini, #37H7200, as needed short one to go behind my vents. The shaft without the gear housing, but including the splined end, are 48mm-1.7/8" long. TR7 ones were 66mm-2.5/8" long. The more the angle of the cowl where the wheelbox sits is different to the windscreen, the longer the shaft needs to be to take up the difference. I had to alter the angle of the bezel until it matches the angle of the windscreen. Otherwise you can get stuttering during the sweep of the blades.
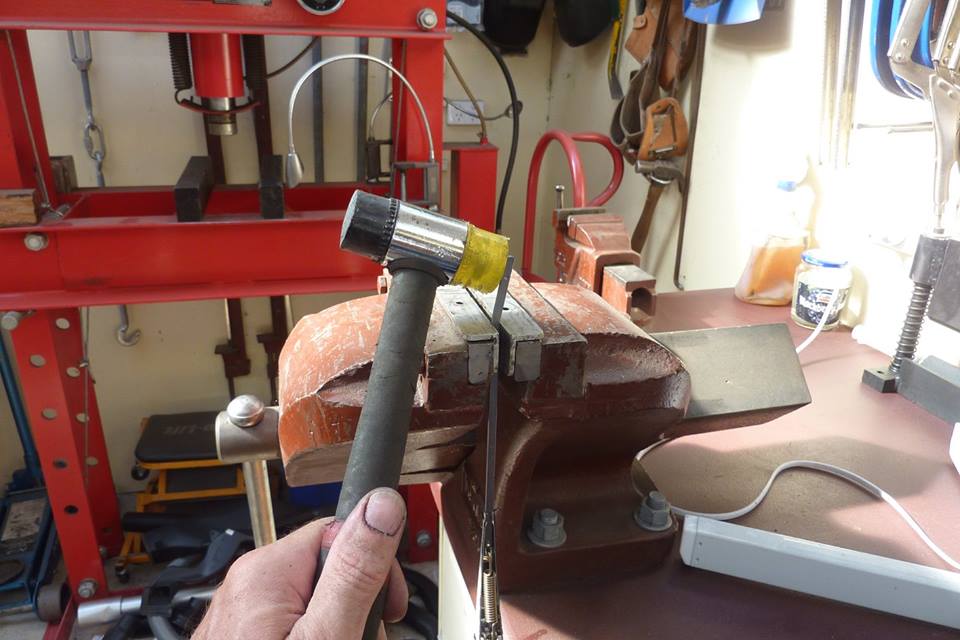
The washer jets are nicely hidden under the arm if you choose to put them on that side. They come in left and right. I also have a pet hate for blades that don't sit flat along the bottom of the screen, so will address that. Clamped the arm into the vice with some aluminium to protect them, then with one hit with a soft faced hammer altered the angle.
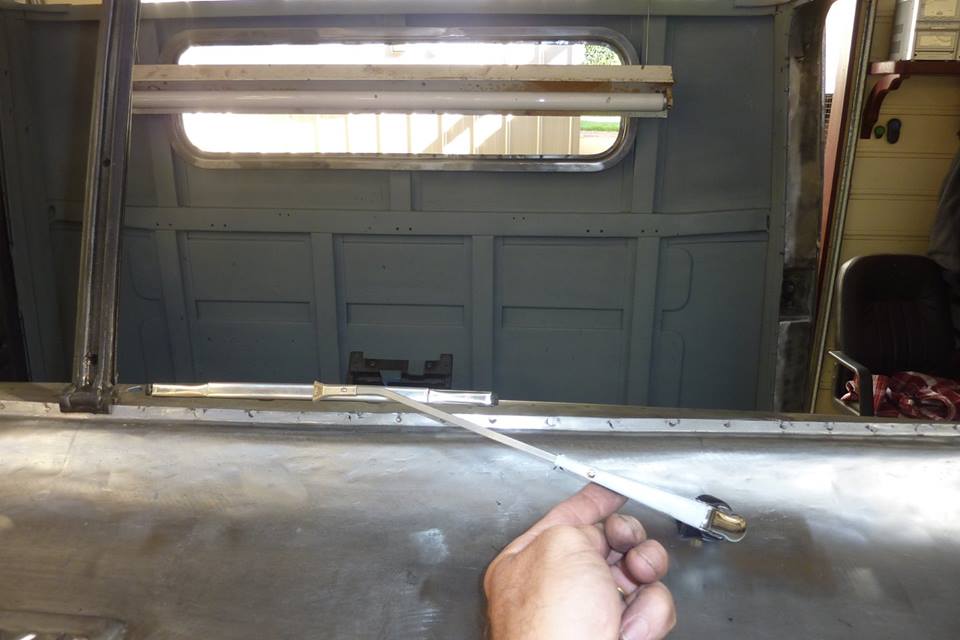

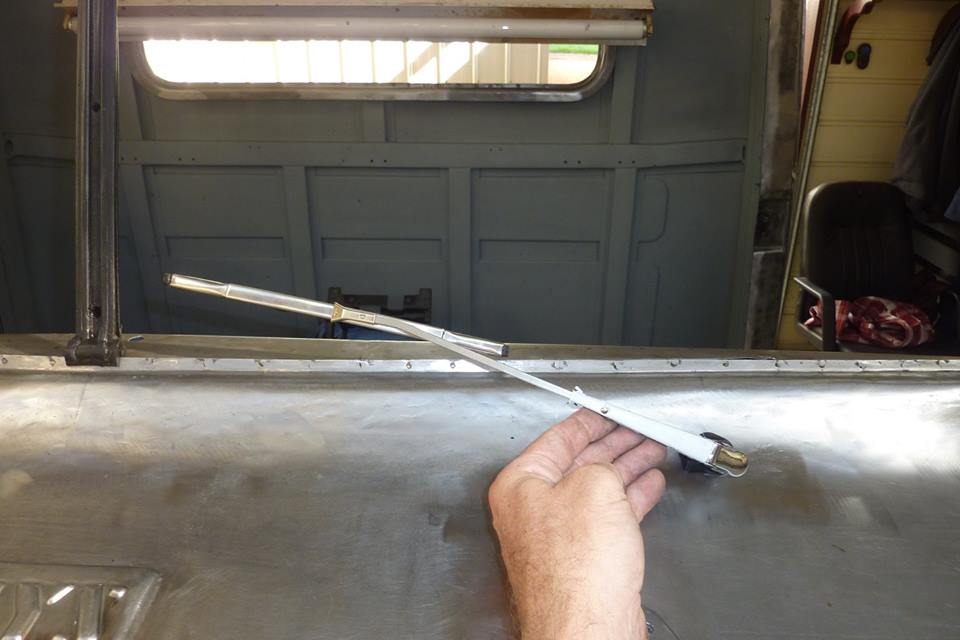
Tried it and got it first go! These arms are good quality TEX brand which are English made and stainless steel. These are OEM for the Classic Mini from 1971 on. A 10" blade with a 11" long arm. The white part is the plastic protection film for the stainless steel. I choose what is called folding arm movement where the wipers sweep outwards to the sides. This leaves the largest unswept area behind the rear vision mirror where you don't look through the glass anyway. Stock was the clapping hands movement where there sweep towards the centre. Just thought I would show how this system works. The rack consists of a cable with a spring wrapped around it. The spring engages the teeth on the wheelbox, or wiper pivot. The motor as a crank that pulls the rack back and forth giving you the movement.
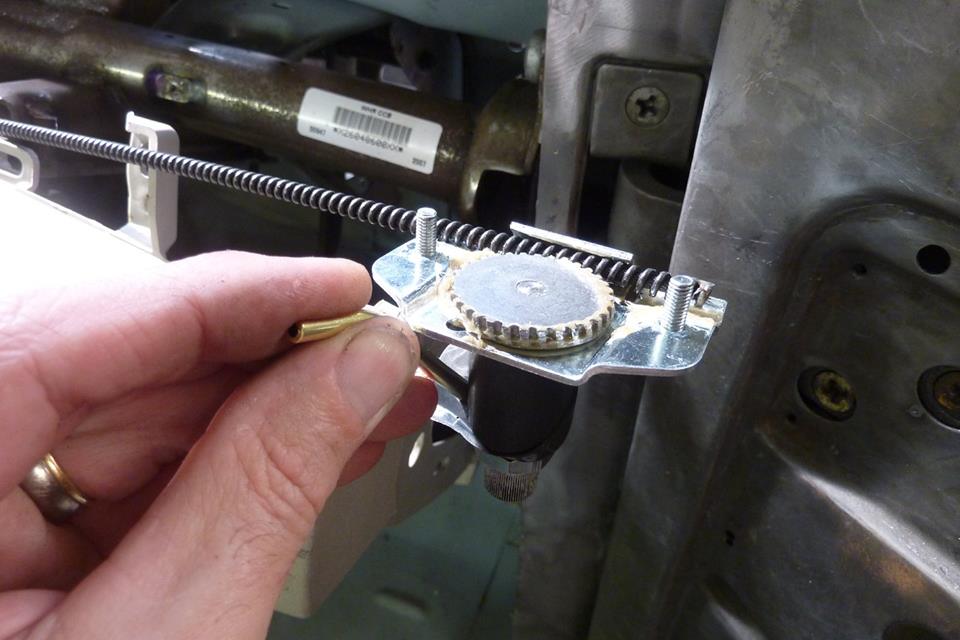
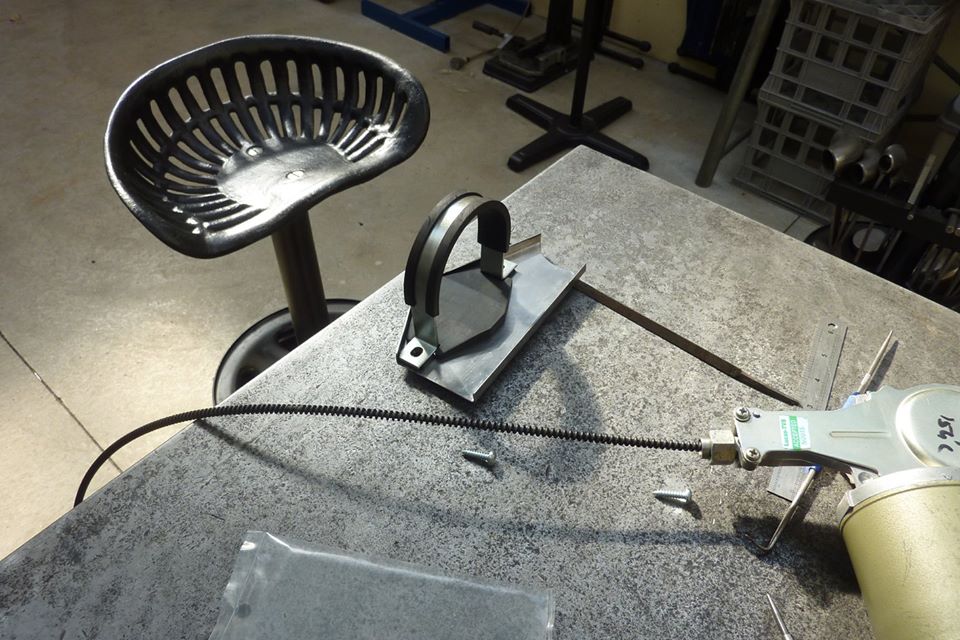
These wheelboxes not only come in different overall lengths, but also in the number of teeth they have. This classic Mini one has 32 teeth but the older Minis had only 24 teeth which would give more sweep of the wiper arm. Some even have 40 teeth which would decrease the sweep. Some Jags even have a different number of teeth one one side to the other to vary the sweep left compared to right side. The sweep can also be changed with different stroke lengths by where the pivot on the wiper drive gear. Can buy different ones from 90 to 150 degrees in 5 degree steps mostly. Can also modify it yourself to whatever you need. The rack runs inside tubing and made mine from scratch. What is used is 3/8" bungy tubing which is usually a mix of steel and aluminium like used for brake and fuel lines often. I have a steel/copper mix which what I could get locally that will work just as well. Straight steel wears the rack too quickly and straight copper the rack wears the tubing too fast. The bend radius should never be less than 3" for the rack to work smoothly. A good idea to leave the rack inside the tubing while bending it to help stop kinking as you cannot have that.
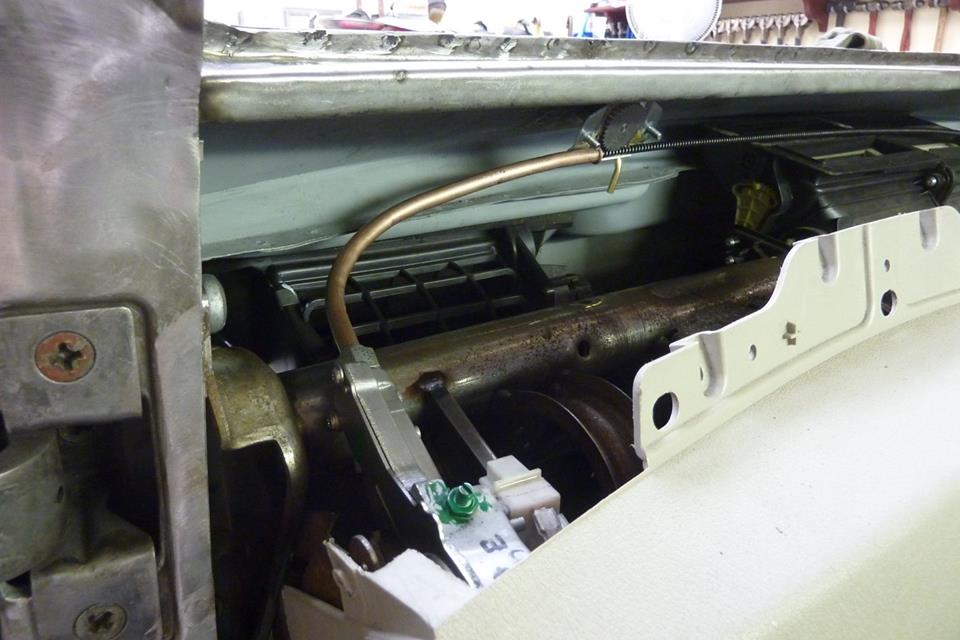
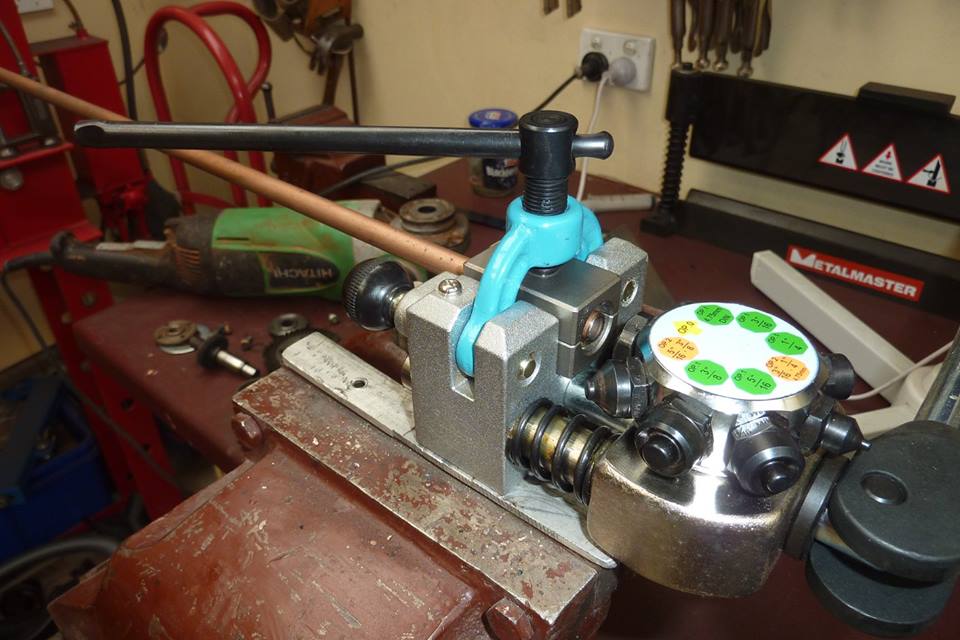
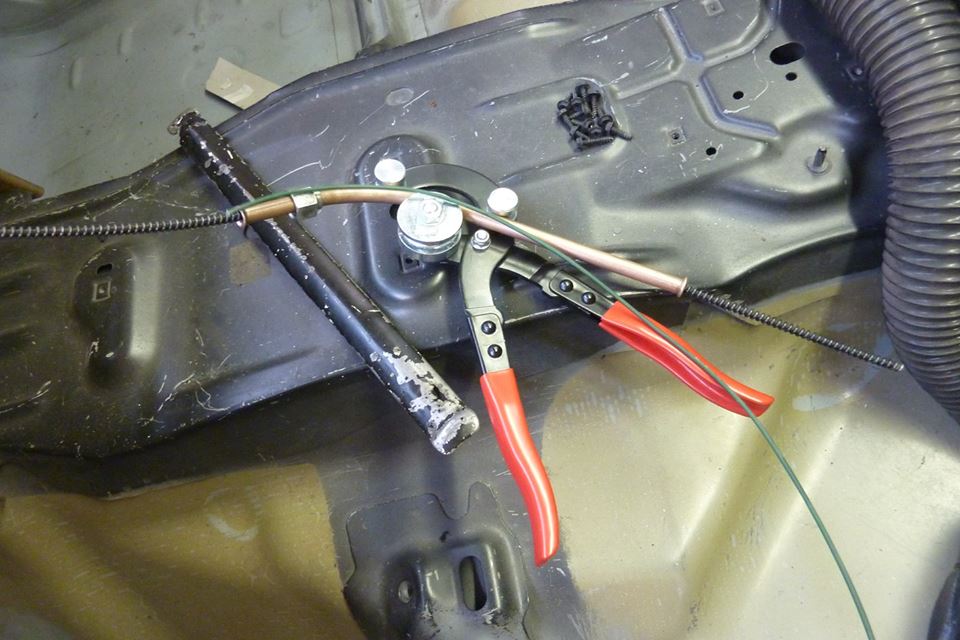
I tried to make the bend as shallow as possible to reduce wear and noise. I use this Eastwoods tubing flarer. I works so quick and well that I wish I had one when I used to work as a brake mechanic long time ago. The first step makes the tubing flush at the end of the die.
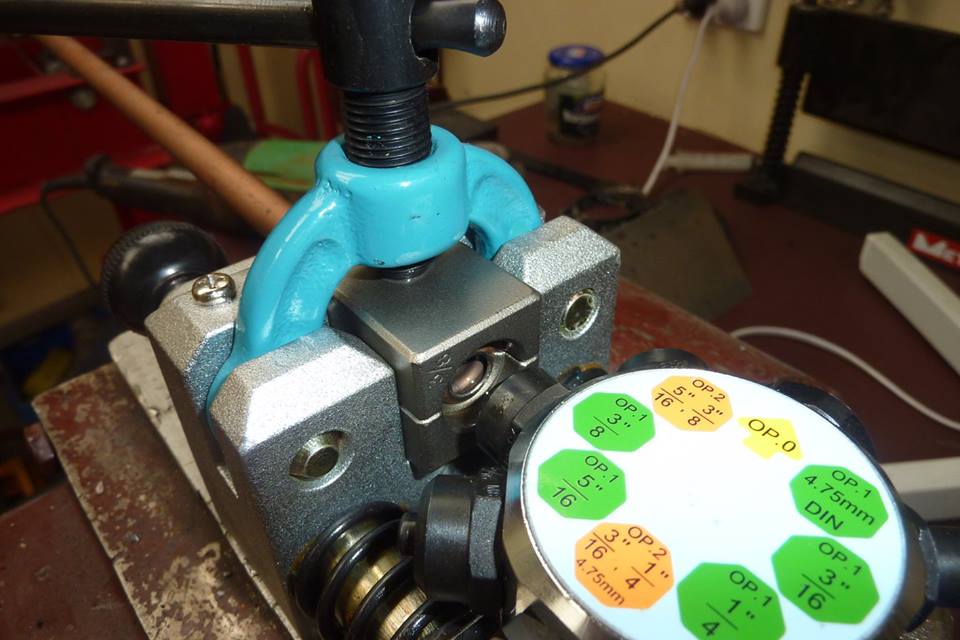
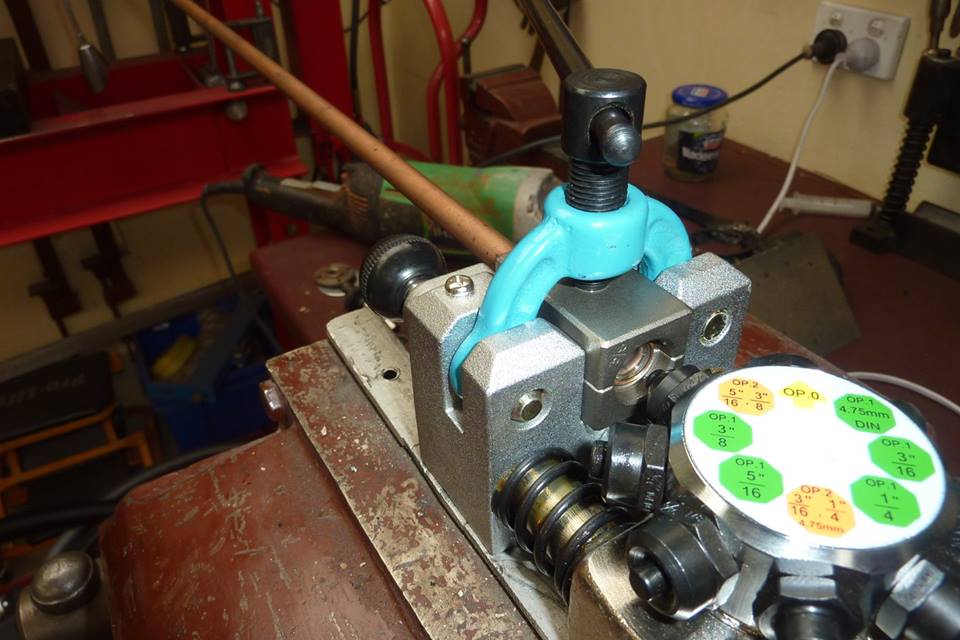
Rotate the head and Step 2 makes the ball at the end of the tubing just by pulling the handle around once. Last step inverts the flare so you end up with a double wall thickness at the end of the tubing. Some people just do a single flare when building their wiper racks.
[Index]