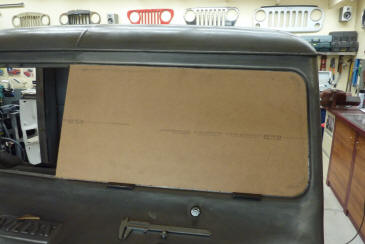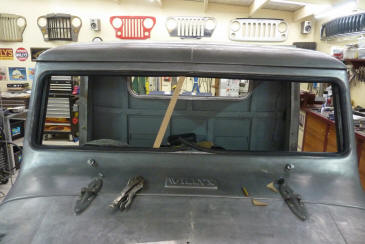

I used packers the thickness of the bottom of the glass channel to check fitment. I left about a 1 mm clearance around the template inside the rubber to give some room to fit it and make sure any movement in the cab wouldn't directly impact on the glass. Took a lot of care in the corners to make sure the seal would sit right to the edge of them. To get an idea on the length of the gasket/seal, I used a tailors or dress makers tape to measure around the inside perimeter of the window opening that the seal sits against.
I knew this would still be too long as the seal will compress and stretch around the corners. I pushed the ends apart as much as I could before marking it as better to have the seal as long as you can as it shrinks over time. Also looks very unprofessional when it pulls in at the corners from being too short. I unfortunately had to weld all around the flange here too as had already prepared it for the useless rubber. 12 meters, 39 feet, of weld was added to the front and rear window openings and ground down. Spent the whole week on it! Then had to make sure the whole flange width was flat, all in the same plane, and straight against the glass again.
Both templates made and made sure the centre gap was parallel and square to the body and lining up exactly in the middle. Using off cuts of the seal to hold it into place and make sure there was an even gap all the way around on the inside with an extra millimetre for clearance. The centre divider seal also came from Metro Mouldings and made specifically for the Willys! I was lucky that a forum member reading my build found it listed for me. I also slide this over the template and compressed the seal as much as I could before cutting it too length. Ended up 6mm-1/4" longer than the height uncompressed. That will keep the seal sitting nice and straight and have pressure on the joint keeping it together.
I used a old flap wheel to carefully shape the ends of the seal so it matched the other seals profile without pressure. Before bonding it together I glued in a piece of the rubber inside the glass channel the width of the gap between the two glass pieces. The divider seal centre section does not line up with the channel and I wanted more surface area to bond the divider seal too. It also reinforced the other seals join and made lining up easier. I coated the ends of the mdf with a light smear of rubber grease to stop it sticking.
One custom windscreen seal to suit a 9" wider Willys Truck! Close up of the join. The mdf made sure all the glass channels are inline.
Doing the same rope in trick. The cord is actually from an old curtain track. I found that not only coating the inside of the channel and the rope, but the outside of the seal lip as well. When the lip is getting pulled over the pinch weld, it is getting pulled against the back of the pinch weld, so the lubricant helps it slide over. I have tried the usual soaps etc but found using my PBR Rubber Grease works the best. This is what I always used as a brake mechanic for assembling brake components as it doesn't swell the rubber like normal grease does. It is caster oil based. These windscreens can be tricky to put in as the seal is not the standard H profile. The glass actually is bigger than the opening and sits behind the flange in a S shaped profile seal. Means the seal height is nearly half of the H profile giving you more glass area. The corners get tucked in first and then the centre is pushed forward to lay flat behind the flange. Nice to have such a beautiful willing assistant. :)
Took us only 10 minutes to rope it in with my wife gently keeping the templates in position from inside the cab. If you push too hard it won't give you room to pull the lip out from behind the flange. I had a couple of centre bars, both inside and out, that cover the join in the middle of the windscreen. While both inside ones were fine, the outside ones were rusted out at the ends.
Rather than try and patch up the best one of the two, I thought it would be quicker, and a better result, to replace it. I practised on the worse centre bar to make sure I could form the ends which was just done over the end of the bench with a mallet. I then folded up a new outer skin. Folded in the brake as far as I could and then hammered over the fold the rest of the way. I made the flanges much wider than needed as they fold easier that way. Then trimmed them down to the final width.
Rather than add a crease in the folder at the beginning, I just ran the tipping wheel up the centre to give it some definition. This way it doesn't go into the area at the ends that will be formed next. From the best centre bar I was able to use the back piece that the screws thread into from the inner piece. The inside of both pieces were first painted before being slid into place. The flanges hammered over tightly and then the very ends of the bar tipped over a cold chisel clamped into the vise.
The dog leg shape at the ends was bent to 45* one way over the edge of the bench before being tipped back the other way further along. They follow the profile of the seal perfectly. Testing to check fit with the templates in place.
[Index]