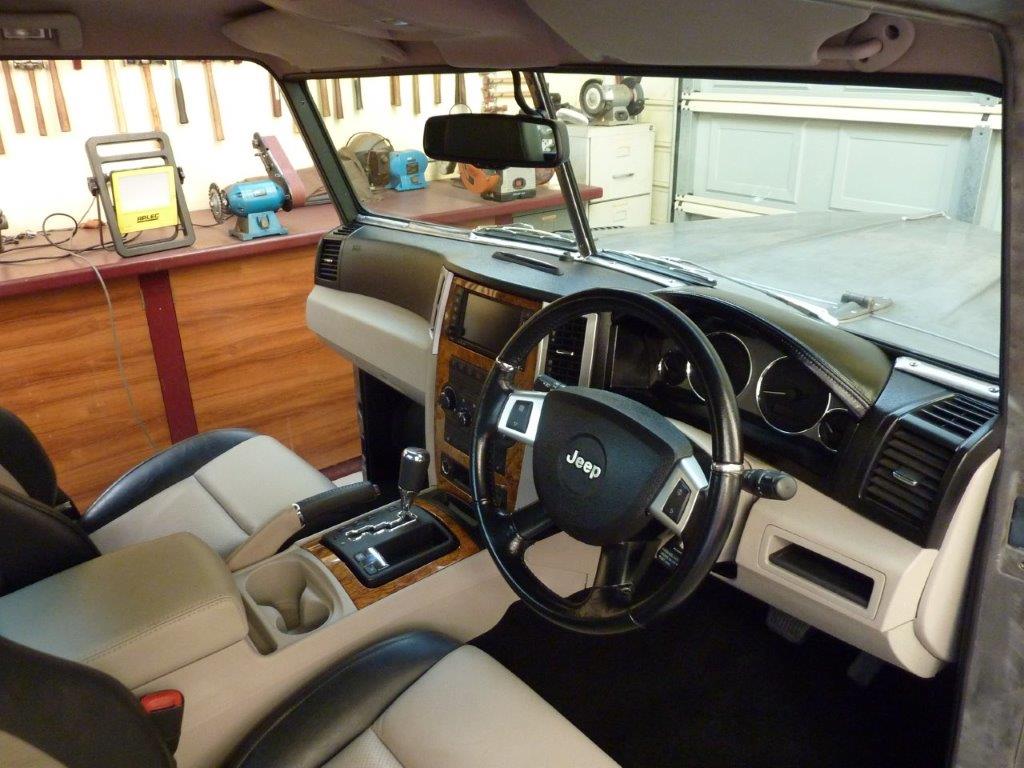
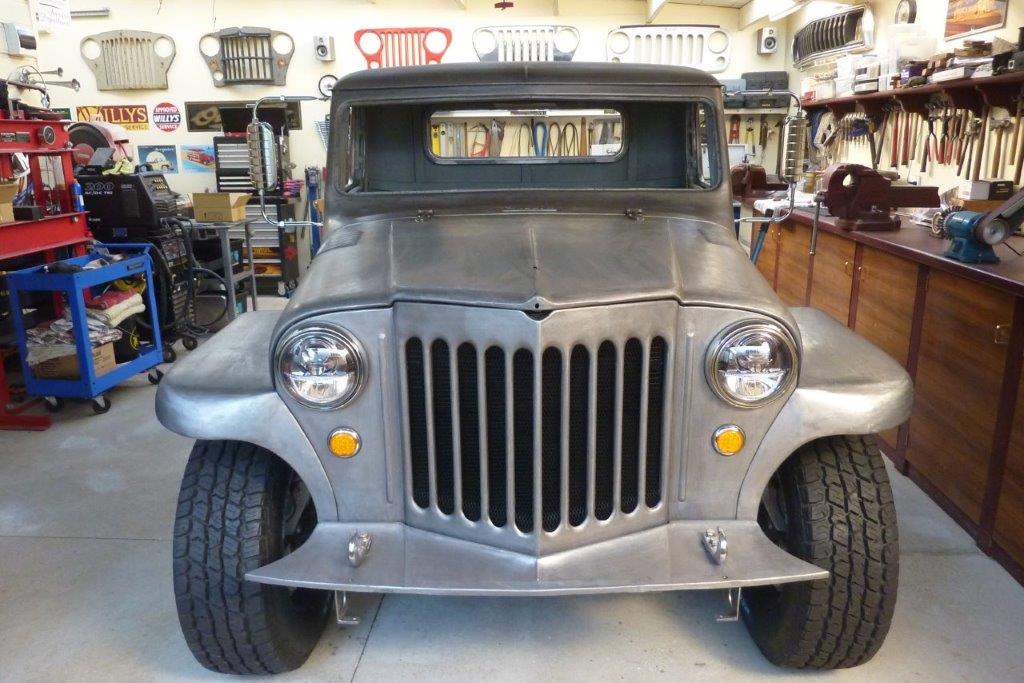
Evening light. Finally got the steering wheel back on! Got rid of the tan lower half and airbag centre and matched it to the stock black top leather. Never liked the look of a modern steering wheel in a older car, but works out alright when all the interior matches with it.
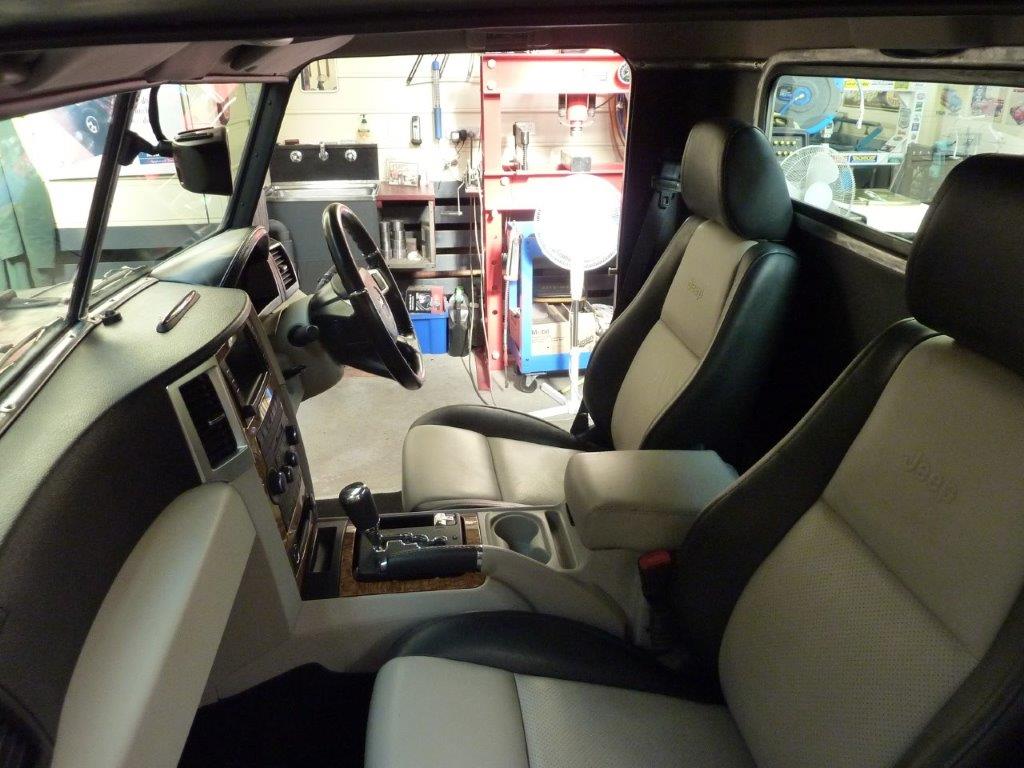
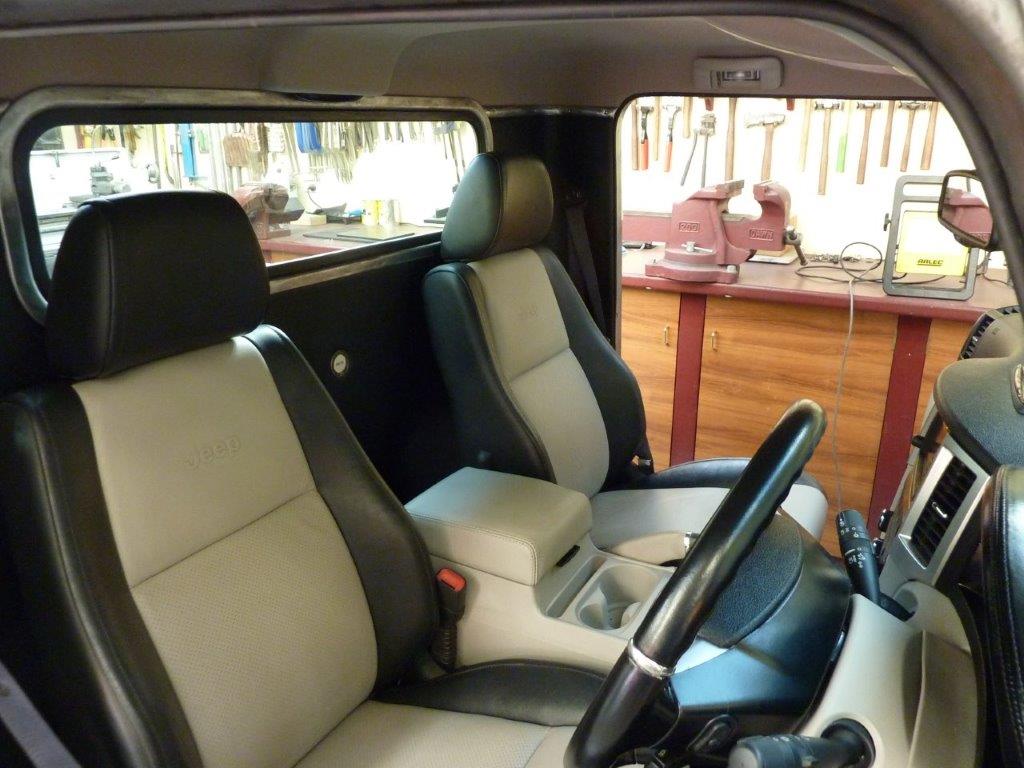
Factory electric leather and heated seats bolted down to the donor floor for the first time. Exactly the right amount of room for my 187cm or 6'2" frame. I adjusted the seats to where I was comfortable before pulling down the donor and marked the floor to how long I wanted to make the cab. Seat height to top of the windscreen is the same as my KK Cherokee daily driver. Console bolted right back into the factory mounts. The modules that were mounted under the donor back seats, I fitted inside the back of the console where the optional rear seat DVD player went.
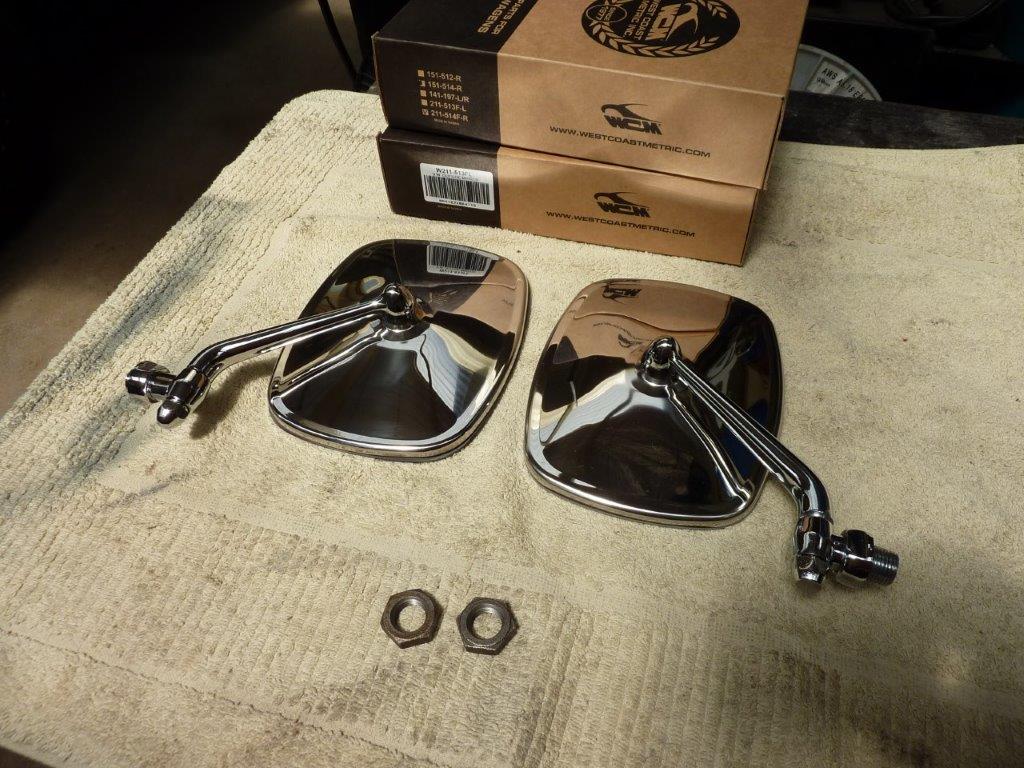
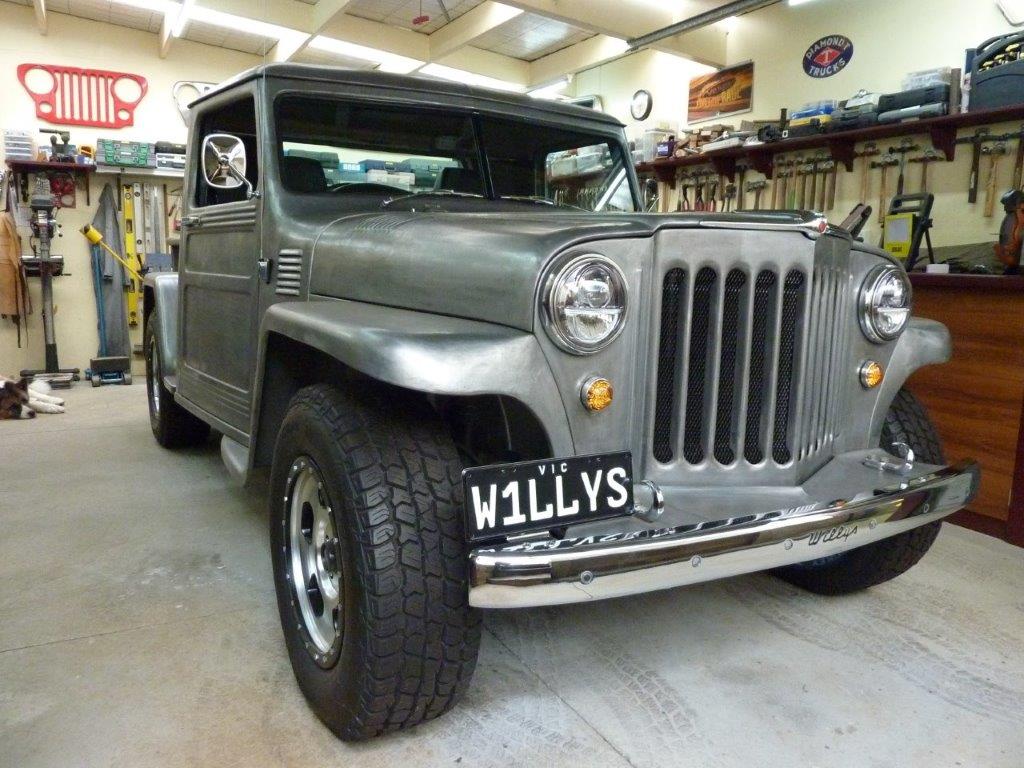
A couple of years ago some may remember me fitting the West Coast Jr. mirrors. Now that I have had a chance to actually sit in the vehicle and see how much I can see from the drivers seat, I realise I can use a mirror that is closer to the body. I found they look better on a stock width Willys than on a wide body one that I have made. After much searching a few years ago I actually wanted these, so went and bought them this week. They are stainless and made by West Coast Metric and are a reproduction of the Type 2 and 3 VW bus mirrors.
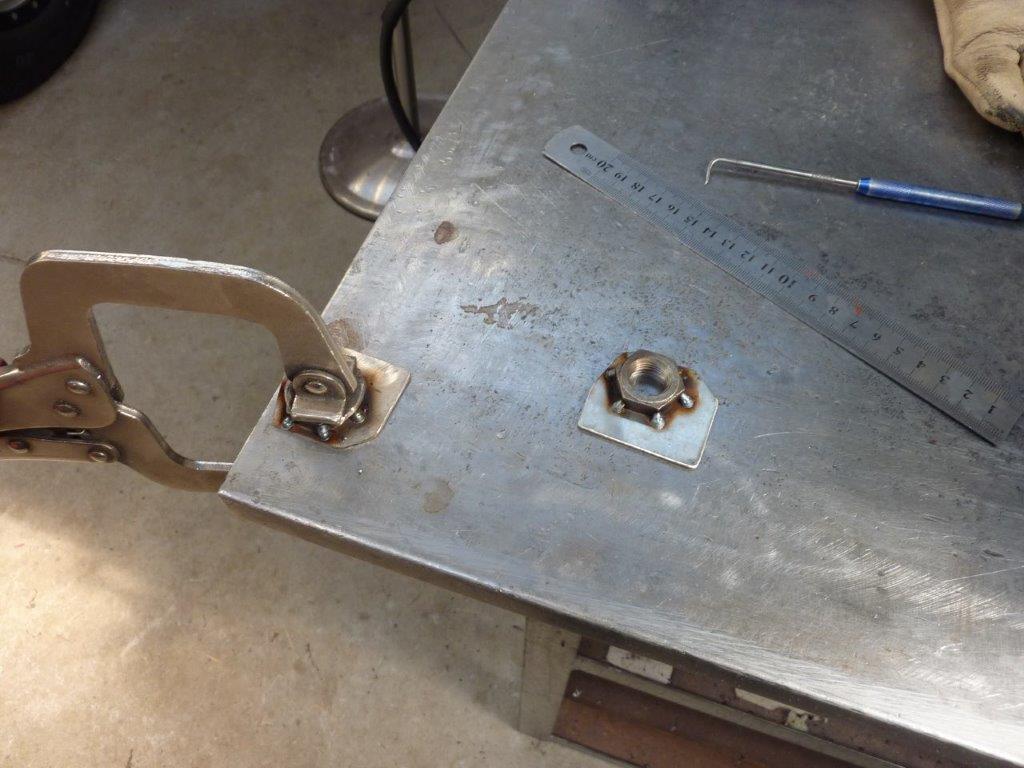

I bought some half nuts in a matching 16x1.5mm thread to the mirror bases. The threaded section is not very long on the mirrors so I machined a step in the back of the nuts to sit flush with the front face of the stainless mounting plate. I noticed that the Totally Stainless version have a longer threaded mount and would be easier. The reason I mounted them to a plate was so it would not only make for a stiffer mount, but so I could use a two part epoxy to hold the nuts in position so and can take the mirrors off and on later without any disassembly. Very awkward to hold the nut and had to move the window channel out of the way to get it in place.
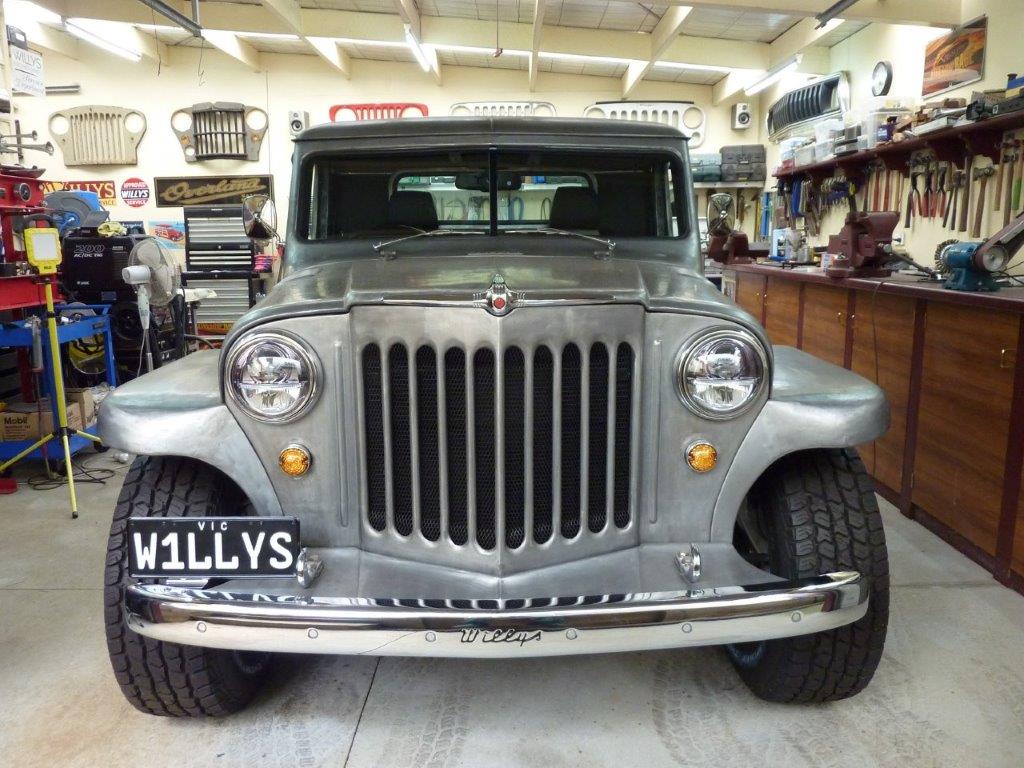
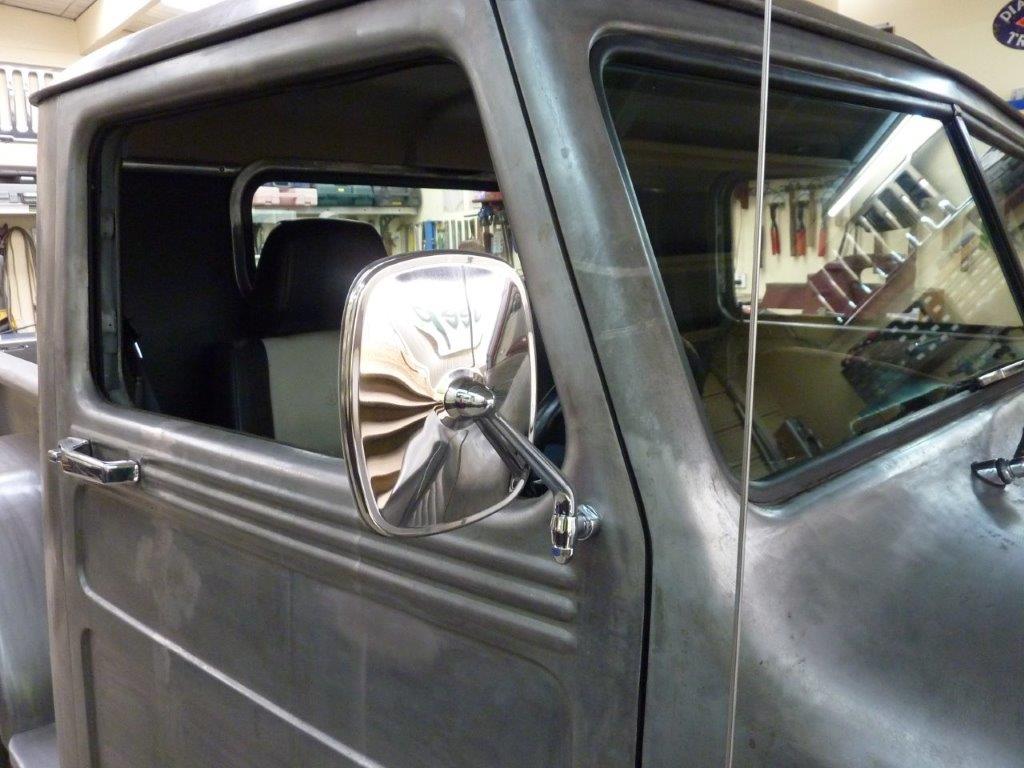
I think these are better proportioned to the lower and wider cab than what I had. Less truck like and more custom as well. This is a very strong area of the door too and there is no flex in the mount which will help against vibration.
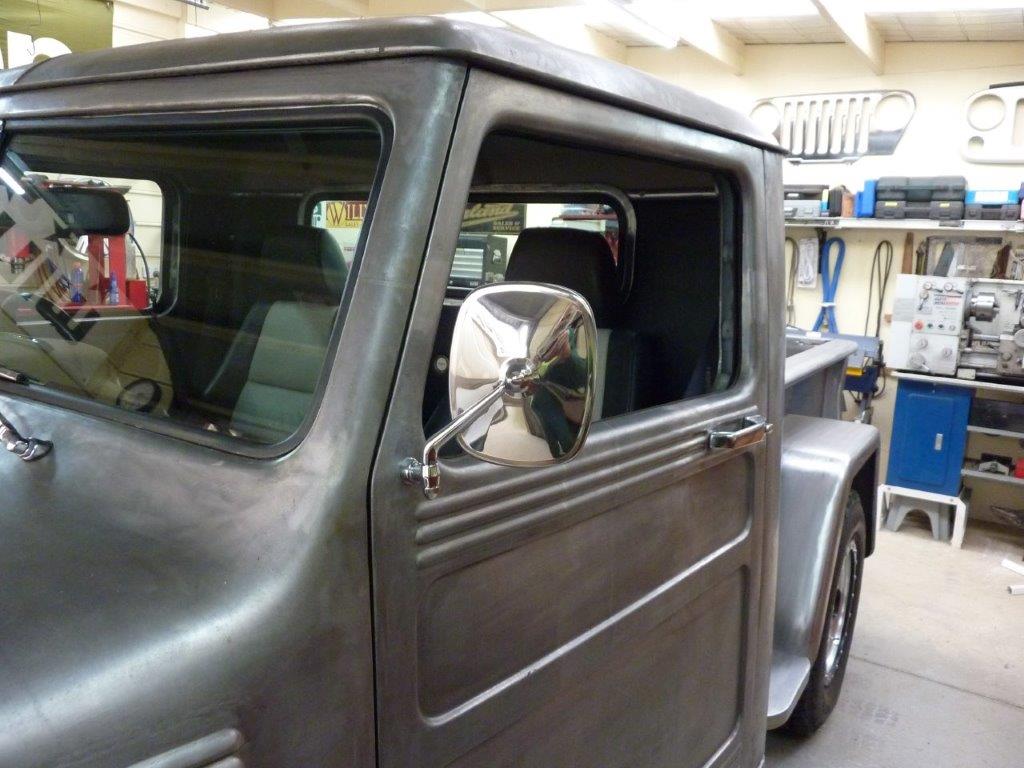
Passenger side done the same. Great to see the doors back on again after all this time too. :)
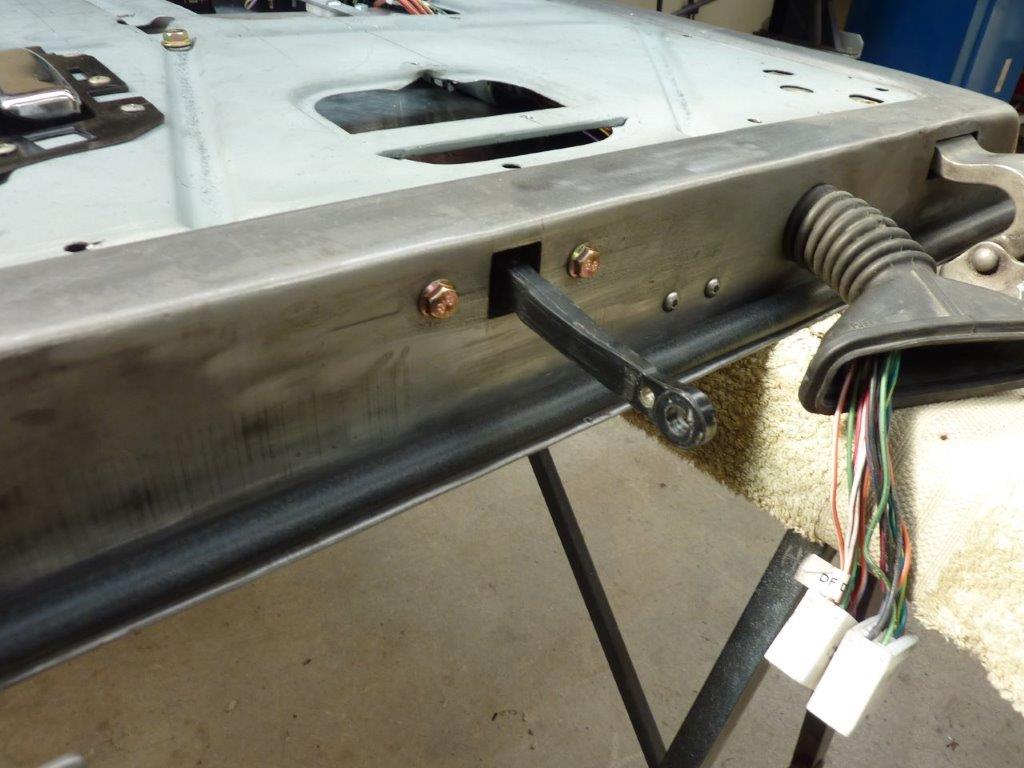
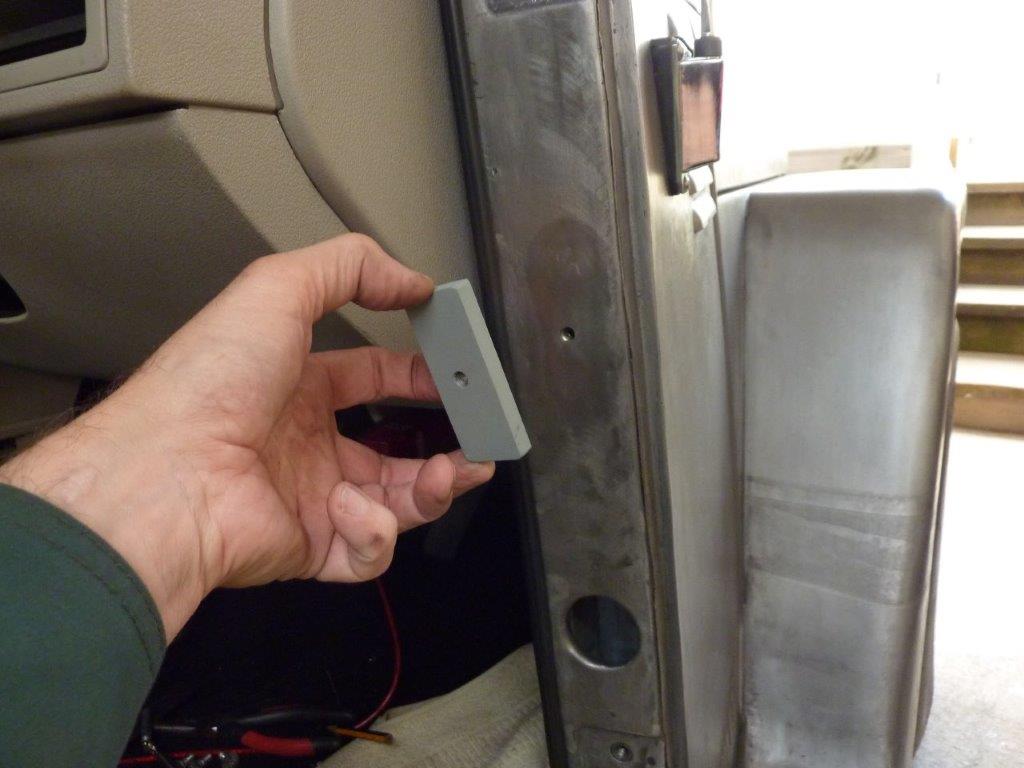
I always wanted a better setup than the leather check strap to stop the door opening too far. When you convert to one piece windows like I did, you run out of room where the stock one went. So spent several hours walking around a wrecking yard to find some that would fit between the glass and the side of the door instead. I was unsure of what length or shape I would need to make this work, so started with this one from a Kia Carnival. The stock check mounts have a bad habit of ripping out of the A pillar if someone lets go of a door on a side slope or a gust of wind grabs it suddenly. So I drilled and tapped some thick flat to take the mounting bolt. I drilled three holes. One for the bracket bolt and one above and below it for plug welding the piece in place once I had lowered it down on a magnet and secured it with the bolt.
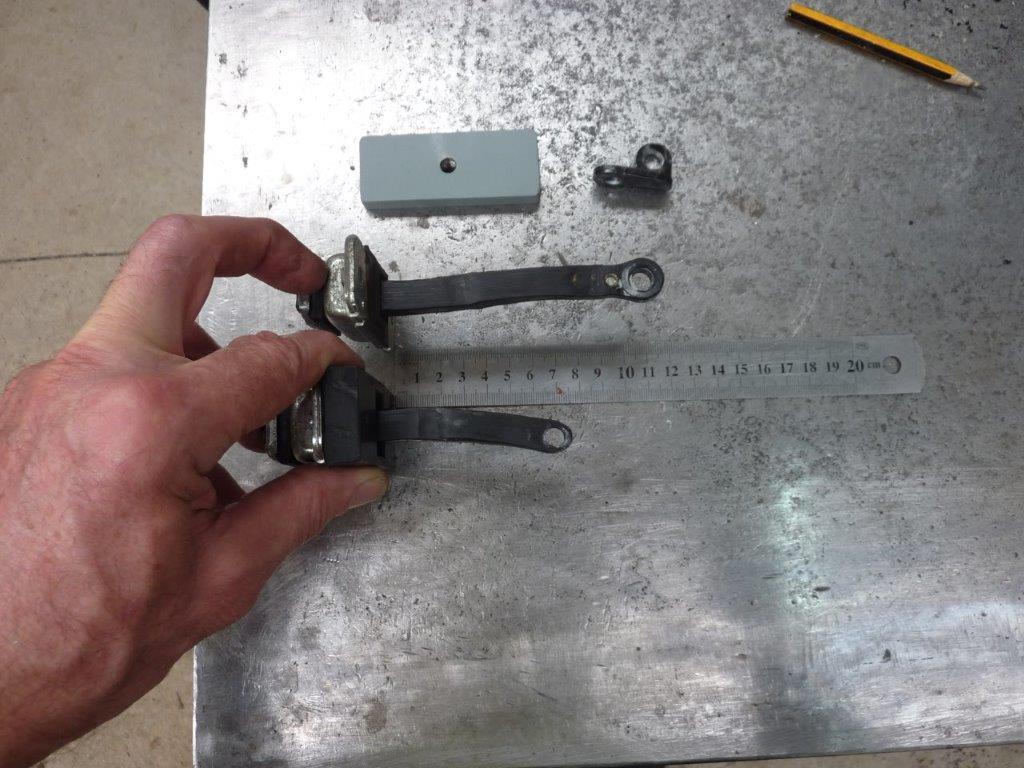
The check strap was way too long so just kept shortening it until the door opened the right amount. You can see also that it needed a curve in it to clear the glass as it was closing. I also made up a spacer from plastic to space it back further inside the door so the A pillar bracket could fit into the door when the door was closed. Because I had to shorten it, the end would be too weak to take the force of the door swinging too far as the hole was drilled in a much narrower section of the strap. So back to the wrecking yard and found that ones off a 2004 Kia Reo had the right length and curve I needed. Also the same bolt spacing and width of housing.
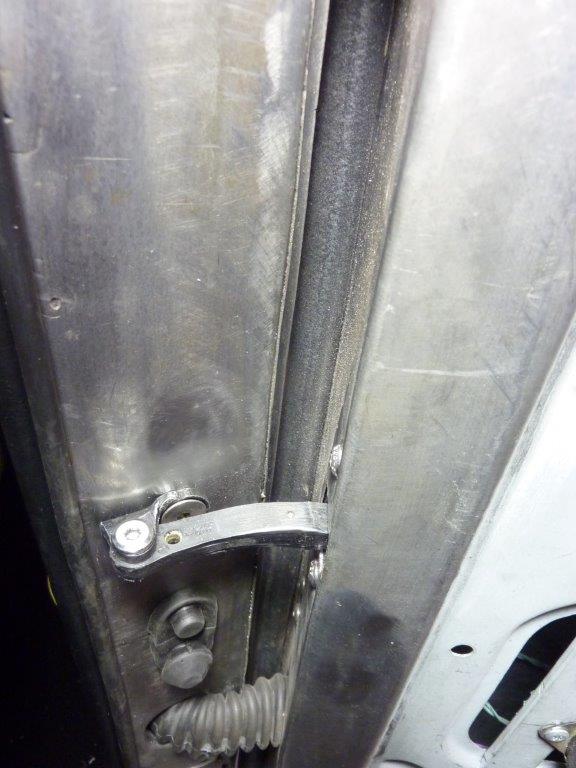

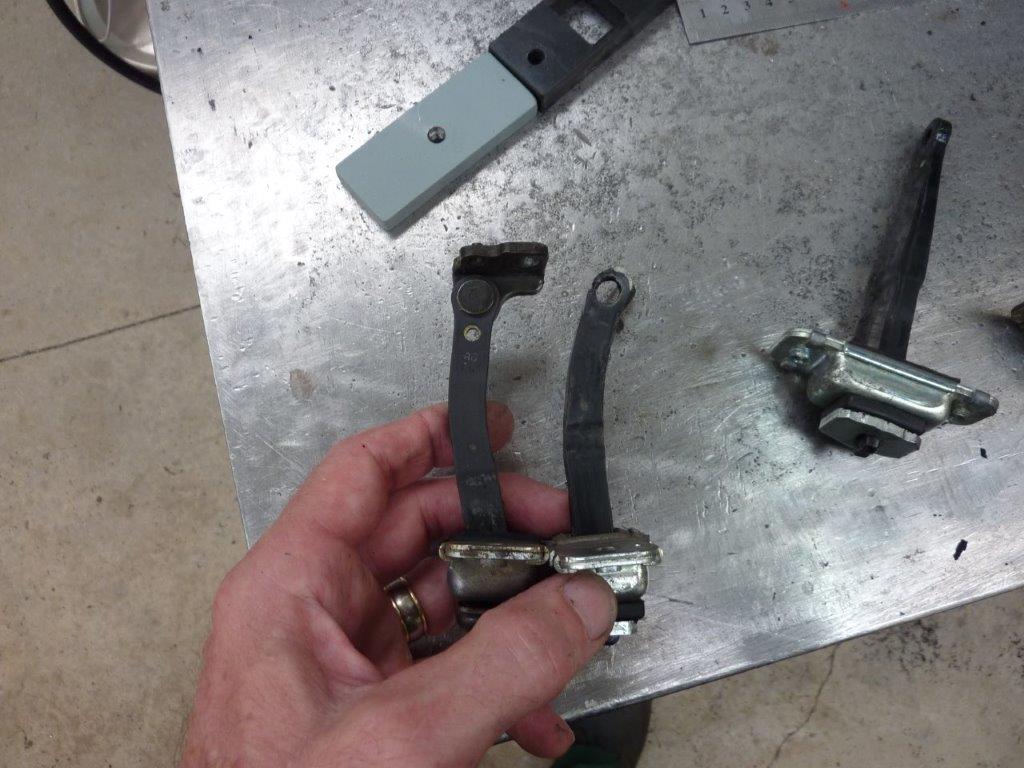
I changed the arm pin to a stainless barrel bolt so it makes removing the door easier. Also counter sunk the bracket to take a door hinge screw for clearance and used button head screws to hold the check strap in place. The biggest issue it solved also over using the leather strap is that now the door stays open! I don't often show this because people might think I'm mad. But I noticed that this door was sitting out more than the other side and moving the door latch pin inwards just made it hard to close.
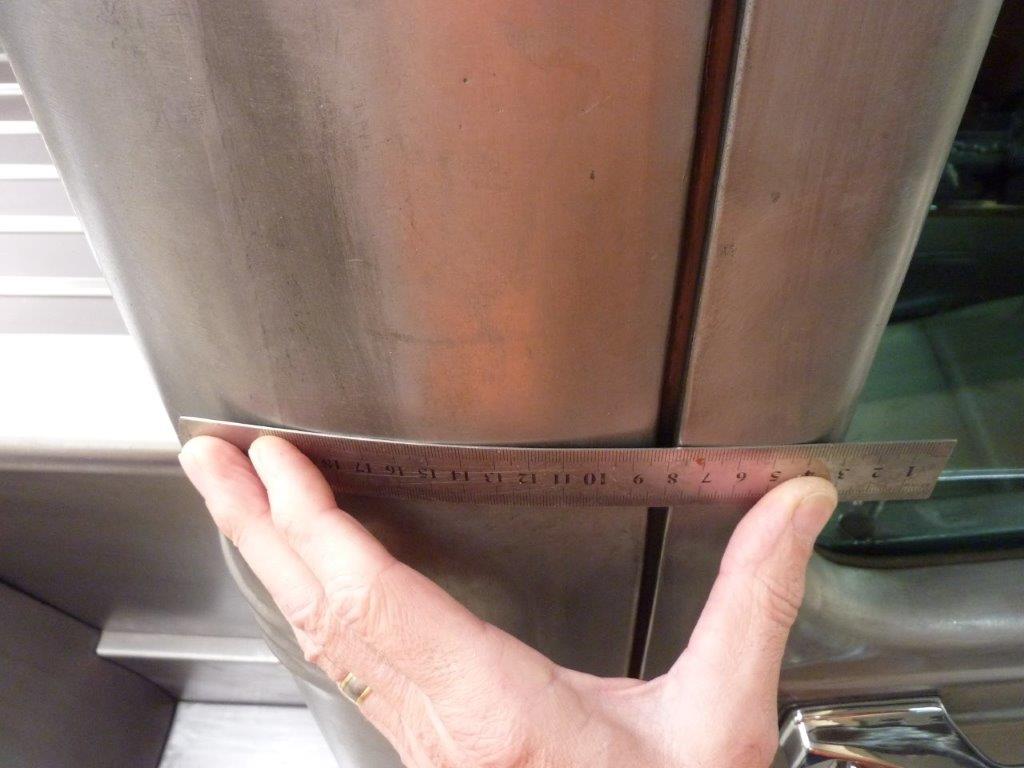
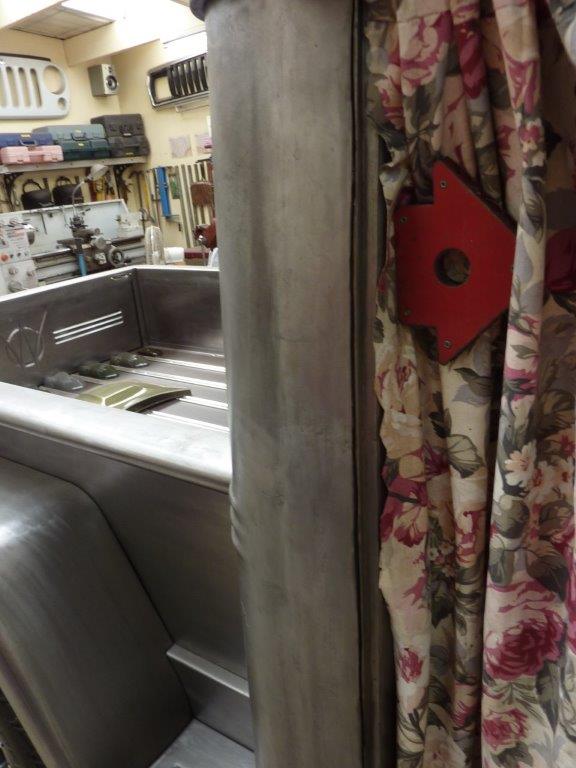
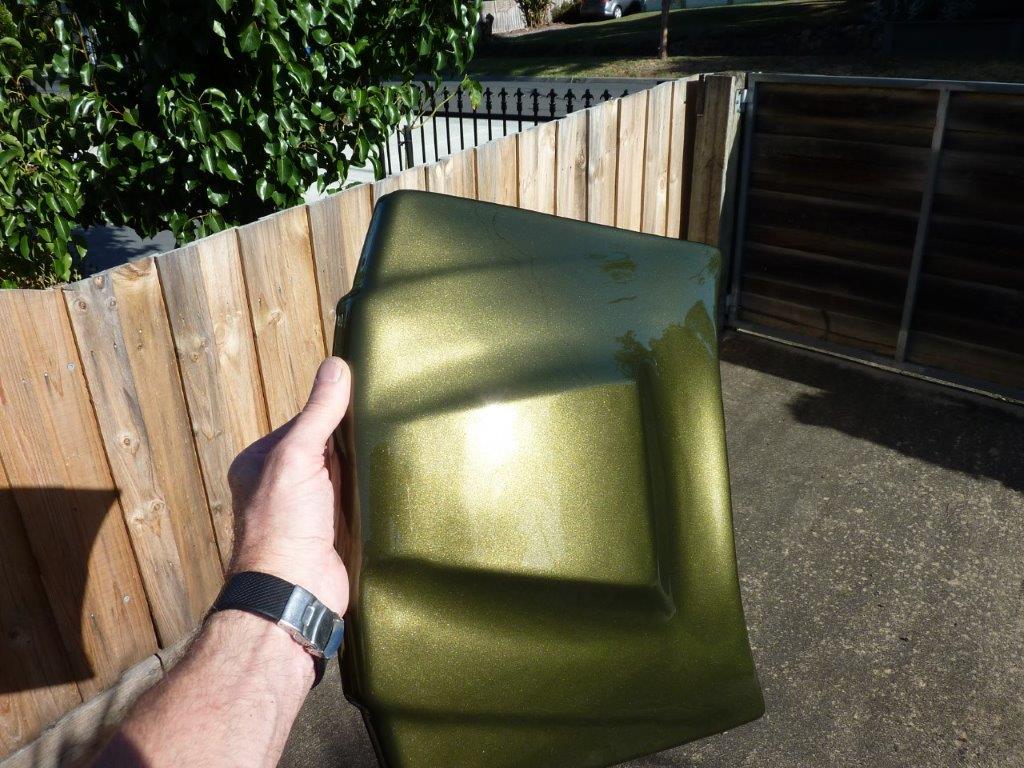
Turns out that the return fold to the B pillar was 3mm-1/8" less on this side. Most would just smear filler over it but that is considered the limit for filler not to crack over decades of use. So I got out the cutting wheel and cut the skin free from top to bottom and along the roof line and floor 50mm-2" as well.
[Index]