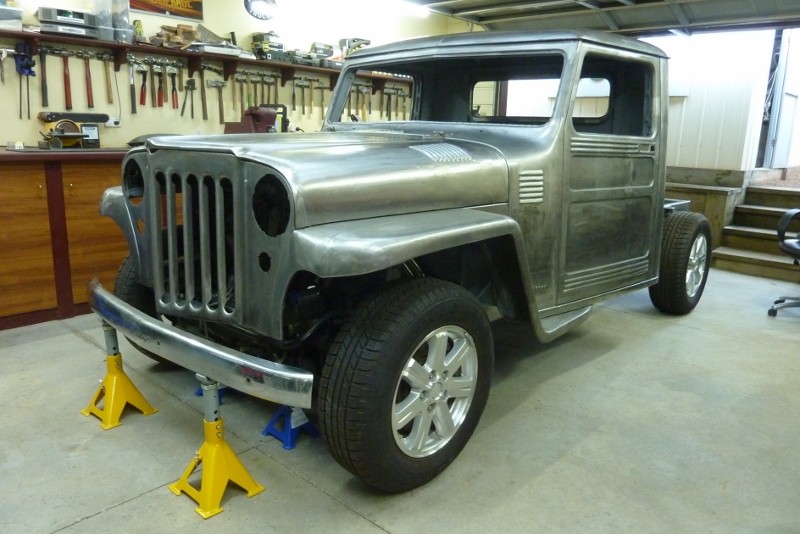

I have raised the front 50mm-2" so the chassis is dead level so I can start building the frame mounts for the body. Looks alright at this height too! I will not be running these wheels or tyres! The tyres are 29.5" tall, (245/65R17), and will go to a 30.5", (245/70R17), or even a 31.5", (245/75R17). Should be alright still on gearing with the 3.73 ratios and the fact it will be around 500kgs lighter than the donor wagon without all the weight of the rear doors, hatch and all the carpet and insulation and such. Wife was not as keen on the looks of the grille without any of the cross bars. They came with none on the 47-50 flat nose versions, or 3 or 5 bars depending on the year for the 50-65 ones. Maybe just one 'floating' bar in the middle will work? I don't want to cover the top and bottoms of the iconic grille slots.
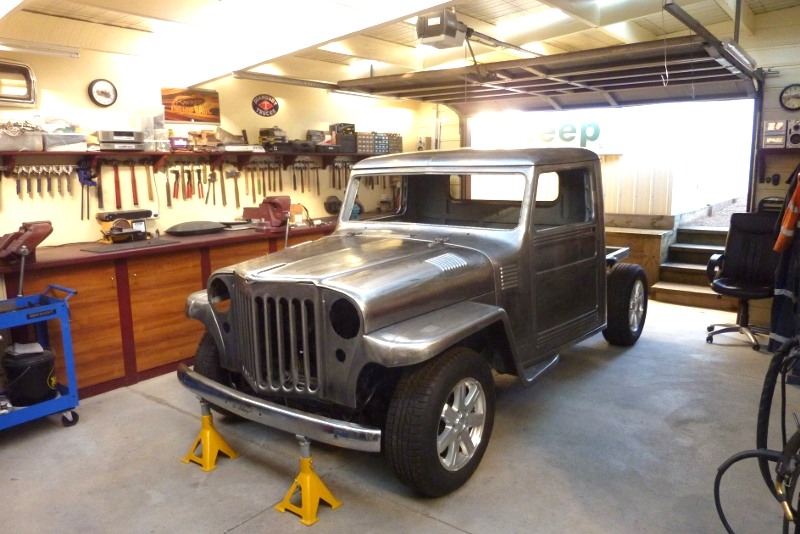
This is the money shot for me. :)
Video update.
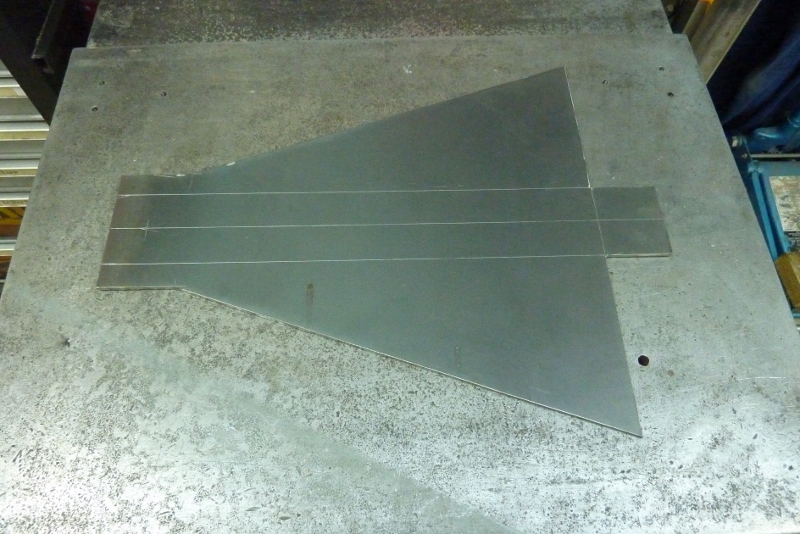
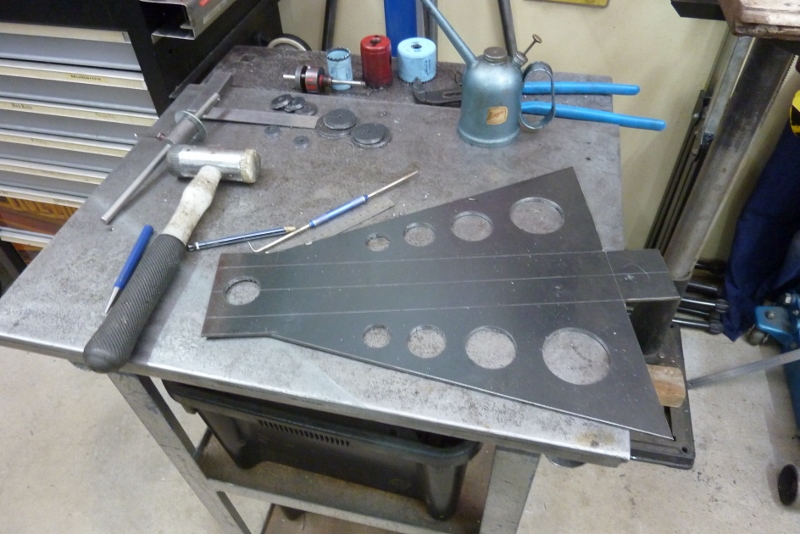
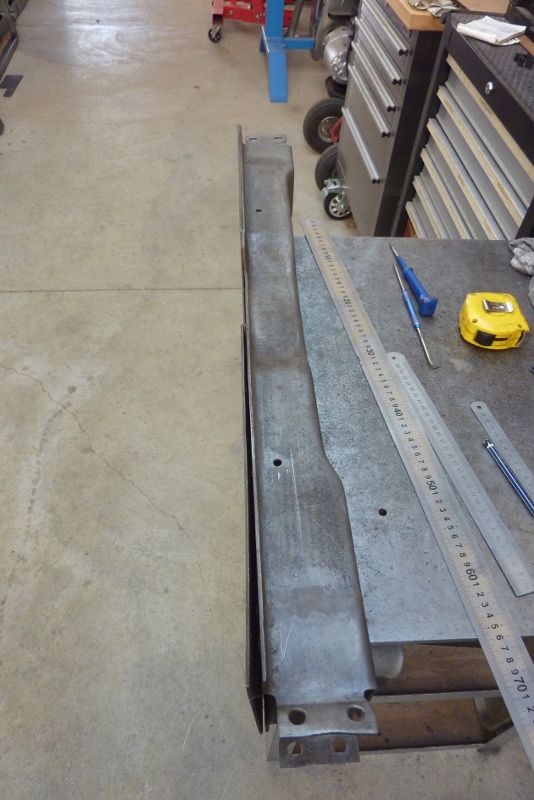
Time to start making some chassis cab mounts. I have gone thicker than stock using leftover 4mm-5/32" plate that I boxed the chassis with. Drilled some lightening holes. I make the hole diameter half the width of the area where it sits. This is good structurally and proportionally.
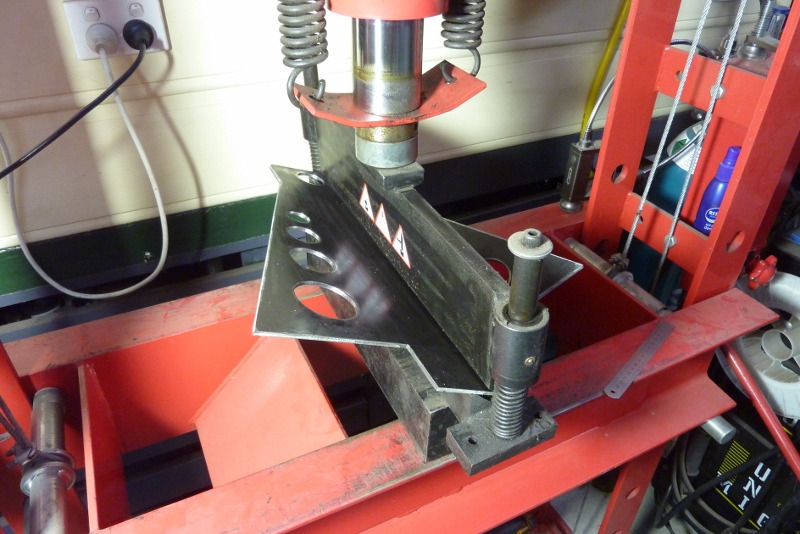

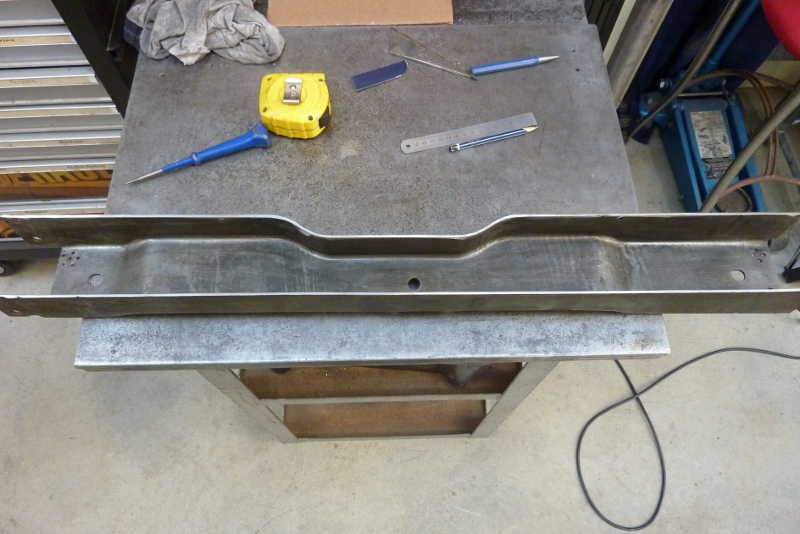
I bought this brake press especially for this job years ago. :) One problem you face though once the flanges are taller than the width of the web, is that it bends the first 90 degree fold back out some when it clashes with the side of the brake while you are doing the second bend. You can avoid this by not going to a full 90 degree fold on both sides, and leave it at that, or make the web wider as the height of the flange increases. Sometimes a bit of both is used.
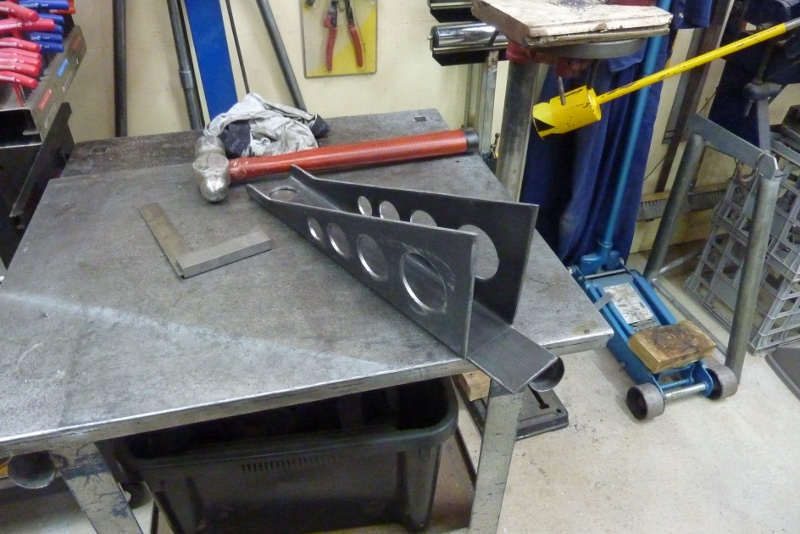
I wanted to keep 90 degree flanges without tapering the web wider so hammered the side square again over the edge of the bench. The thicker the steel, the bigger the hammer to get it done. The large hole at the end is to take the step in the bush to keep it centrally located. I much prefer rubber for better isolation of noise and vibrations. I bought a complete set including nuts, bolts and washers to suit a 1964 - 1967 GM Chevelle convertible. They are 52mm-2" in diameter.
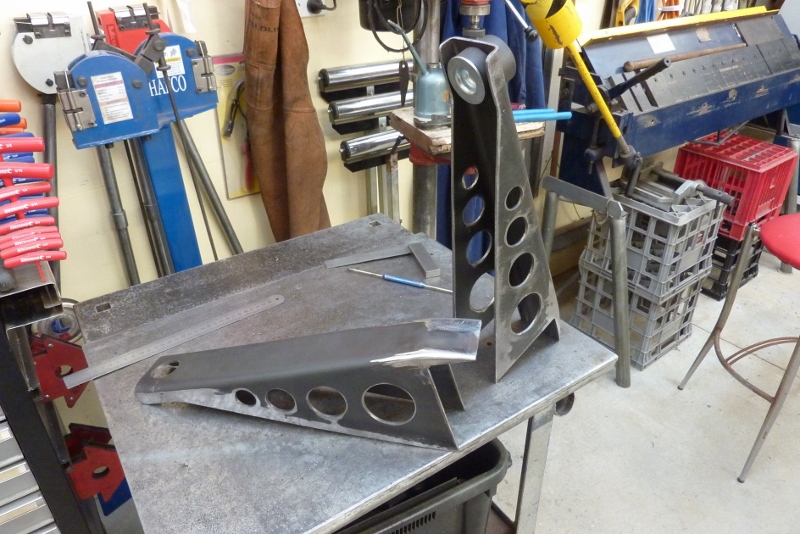
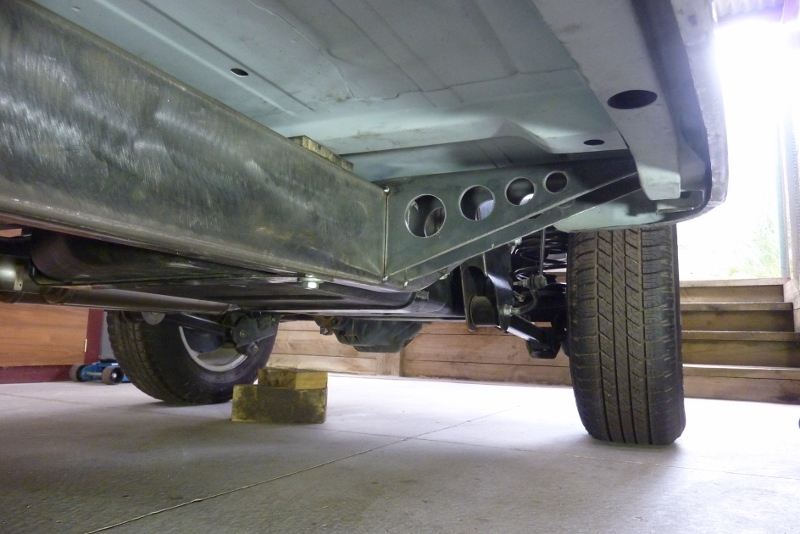
These sit a bit above the chassis rails so the tab at the end goes over and down to the other side of the rail. This greatly increases the weld area at the top and prevents such a long bracket trying to tear off the side of the chassis. Here it is tacked into place directly under the drilled plate welded at the bottom of the B pillar when I built them long ago.
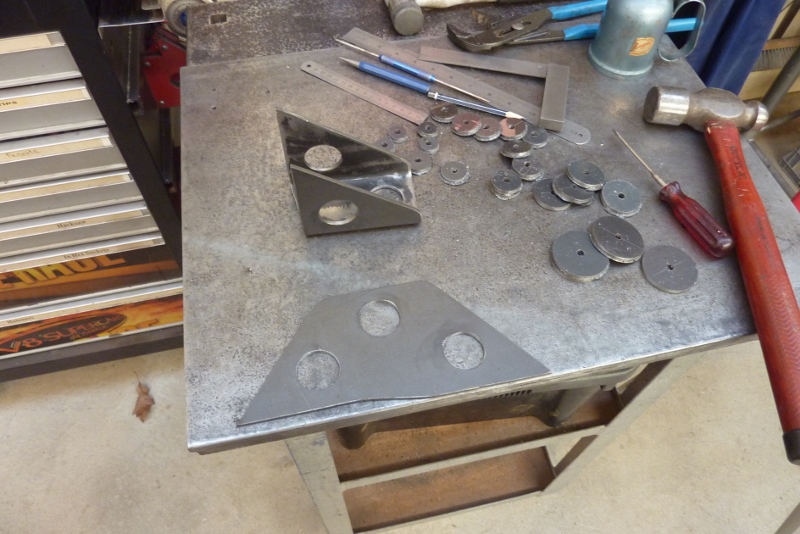

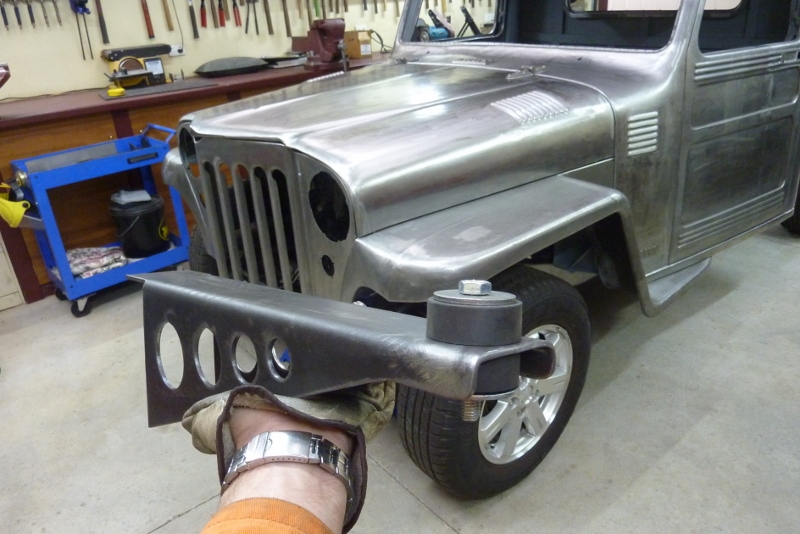
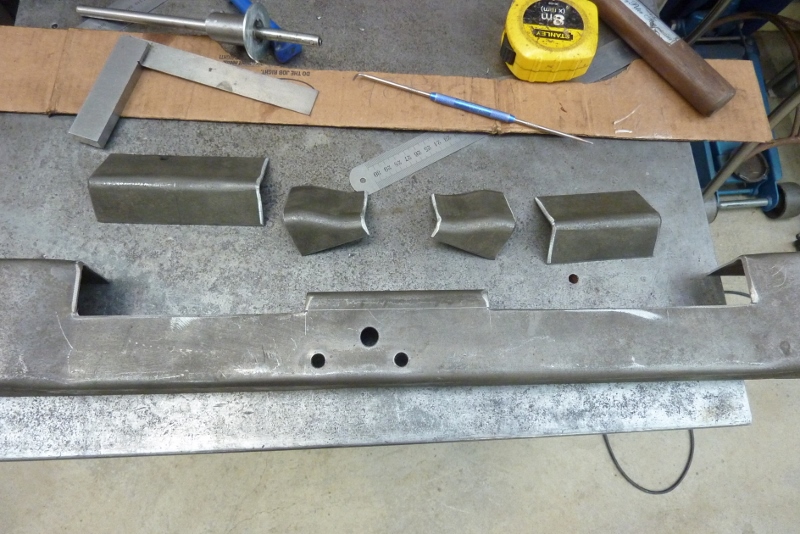
The front mounts are a lot shorter due to how much the cab tapers. I have made them with the angle in the web as the frame tapers inwards where they attach. This way the mounts are still perpendicular to the centreline. I keep all the holesaw slugs too as they make great heavy duty washers and for filling holes in chassis rails etc. Have this tacked in and all the mounts I bolted in. I have measured the compression on the rubber to keep them all the same. I will fully weld them with the cab off for easy access once I am sure no changes are needed.
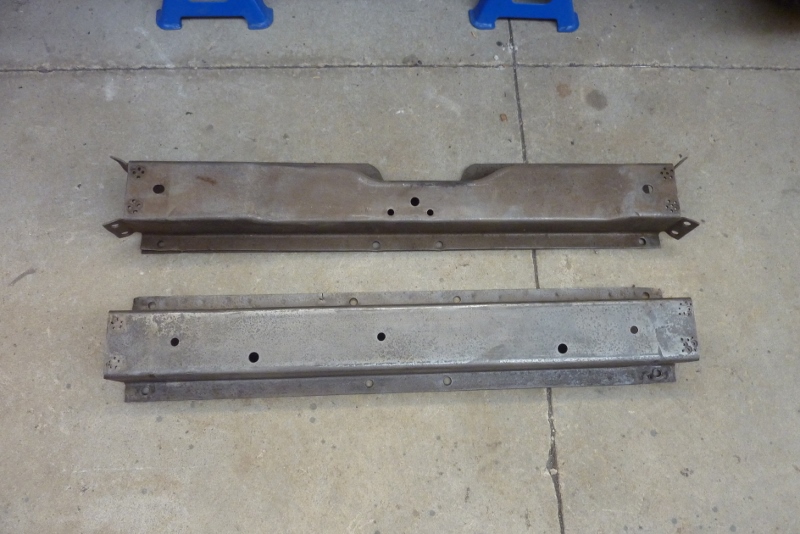

When building the chassis I knew I didn't have quite enough room for the front cross member between the front of the engine and the back of the fan, so left it out for the time being. I have both the 4 cylinder one on the bottom and the 6 cylinder one at the top to choose from. I'm going to go with the 6 cylinder version as it drops down and has a cut out for the harmonic balancer. I only have the width of the narrowest part of it to fit between the fan and the bottom pulleys! And that was after I had already moved the grille forward 40mm-1.5" when re-profiling the front guards.
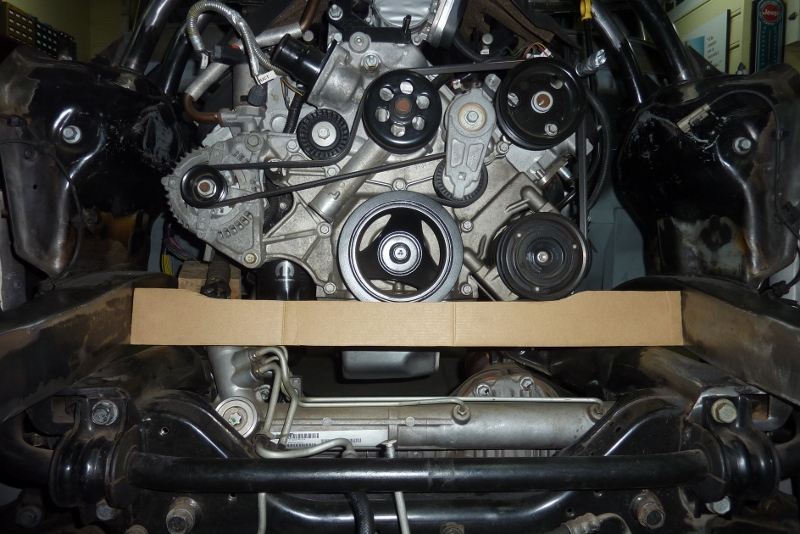
I find making a cardboard profile of the cross member helps visualise what needs to be done rather than start cutting away steel. It doesn't clear the underside of the pulleys, but not that far off. Can see why the 6 cylinder one was a better choice. The bottom plate is just spot welded on and was already coming apart. I need the flanges removed for more clearance anyway, so will cut it off for now.
I was surprised how clean it was inside! I had soaked it in the citric acid bath 5 years ago and then just pressure washed the inside from ends to rinse it. The cut out for the balancer was not long enough as it needed it to clear the A/C compressor as well, so will reuse the factory pressings and move them outwards.


Can see how it goes together while still only using steel from the original cross member. They just swapped places after the fill in pieces were cut down. Now even though the longer cut out means it clears the front of the engine, it only just fits between the engine and fan without clearance. Rather than make the whole cross member even narrower, I will get it to go under the engine to give me the clearance I need. I cut a V into it but not all the way down, leaving 13mm-1/2" at the bottom. When I did the chassis rails I left 25mm-1".
[Index]