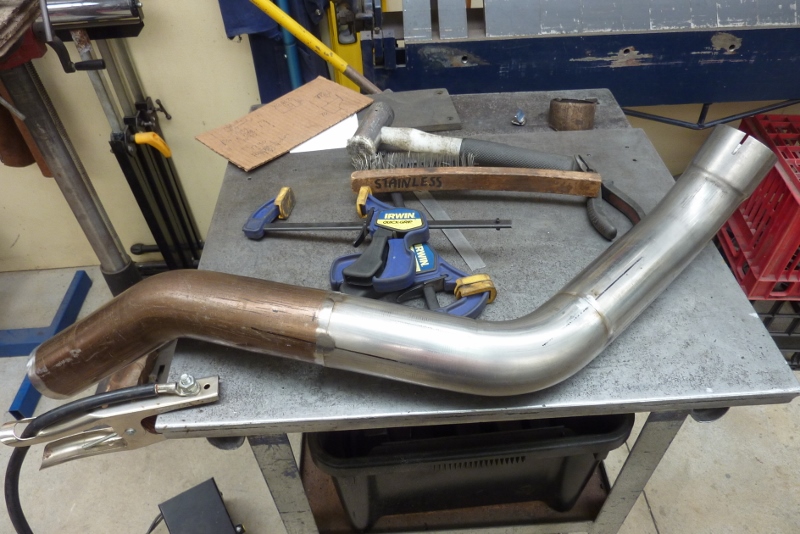

I just draw a straight line using a ruler over the hose clamps before disassembly. Better than small marks as you can make sure the line is still straight after tacking in case it wasn't butted up square. I have used a paint strip disc to clean the old stainless and also the welds. If you don't clean the welds, either mechanically or with acid to pacify them, it will rust there.
Just had to meet the two sections together between the cross members. Needed a slight bend. I measured the furthest and narrowest side of the gap and found a bend that would match it. I used hose clamps as a guide to draw my cut lines around making sure they match the smallest and largest measurements. The bend lined up first go using this method so will tack it in place in situ to make sure it all lines up after welding.
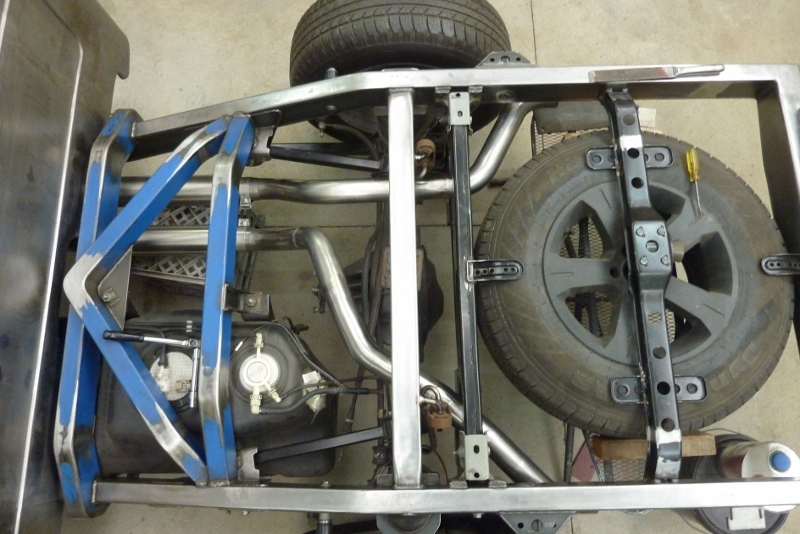
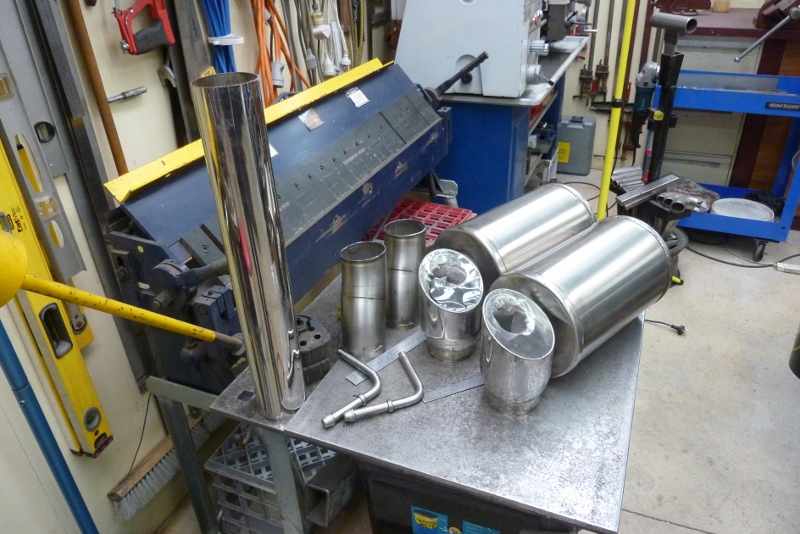
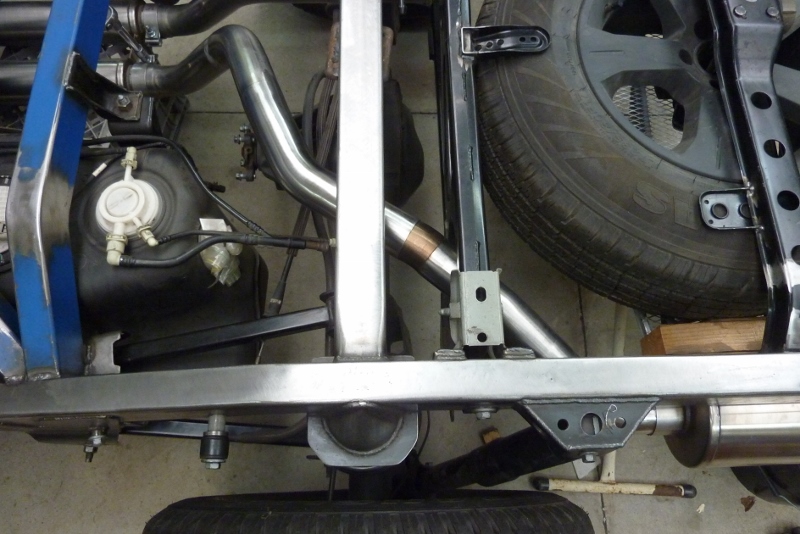
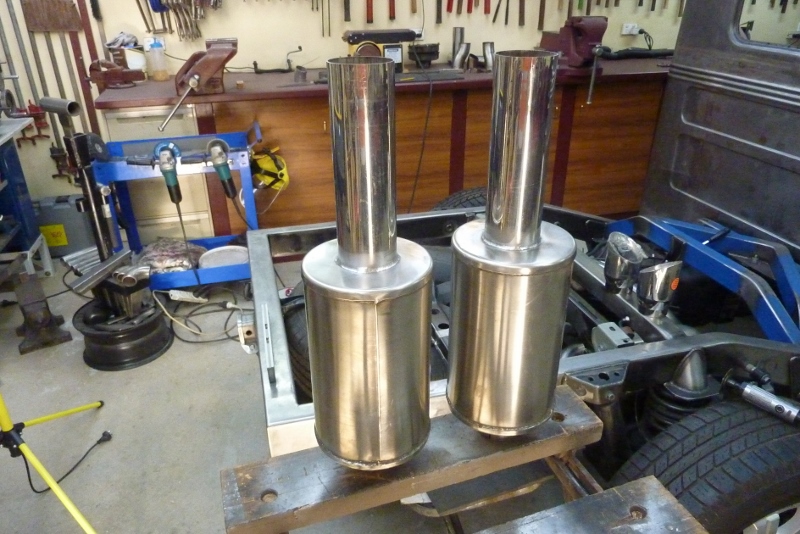
Have the two hangers in place with two more to go after the mufflers. It worked out better than I expected actually as was going to buy new bends, but actually had to use every little factory bend to clear everything and was the only routing that I could have taken. From this view it looks like I could have just taken a 90* bend after the cross member and then run in front of the tyre before going down the the muffler on the other side. But there just isn't the room as the diff would have hit it at full compression and the panhard cross member is deep on the left side. Now to fit up the resonators. They had 3" S shaped bends welded on to get the tips down and closer together. I didn't need that so cut them, the tips and the hangers off. I had some 3" stainless steel tubing left over from the nudge bar from my other Jeep. I had used the rest of its bends to make a new tailpipe for it too!

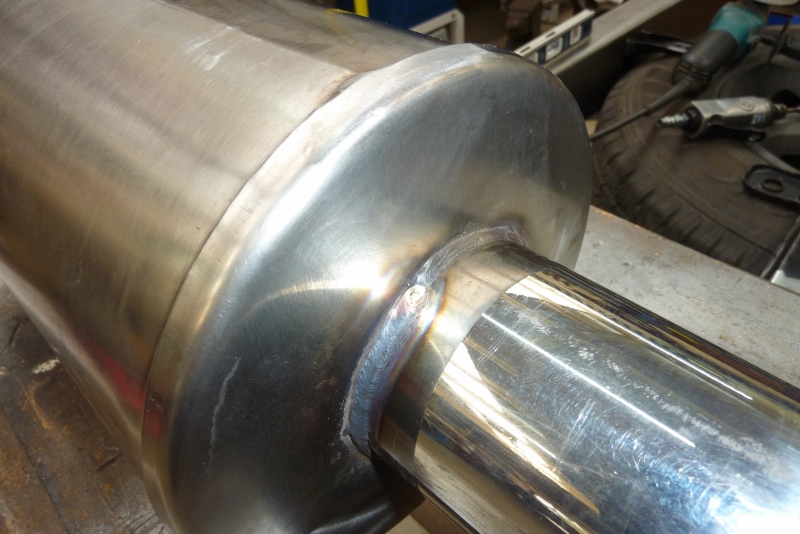
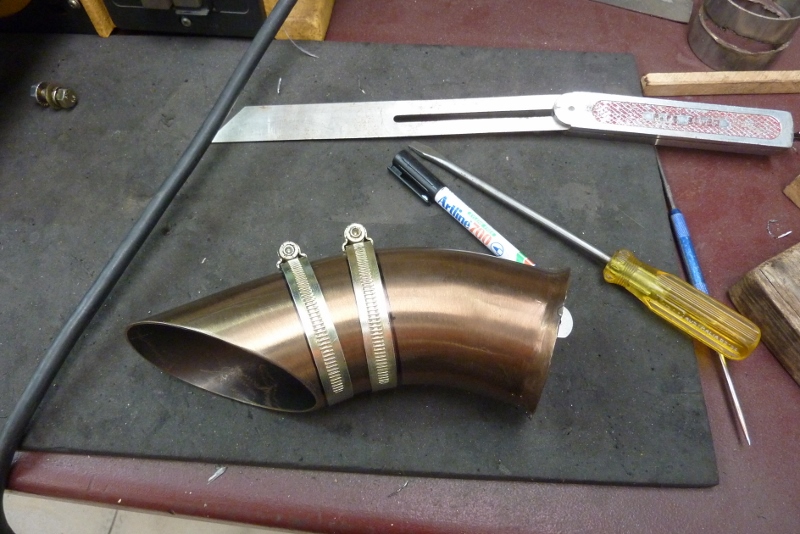
When I cut the bends off I left the original factory mig welds in place. I have just sat the straight piece of tubing straight on top, so not welded yet in this shot. To weld the new tailpipes on I used the tig to heat the mig weld and wash over the join. The side is done and you might be able to make out the join still on the untouched weld across the top in front of the mig weld.
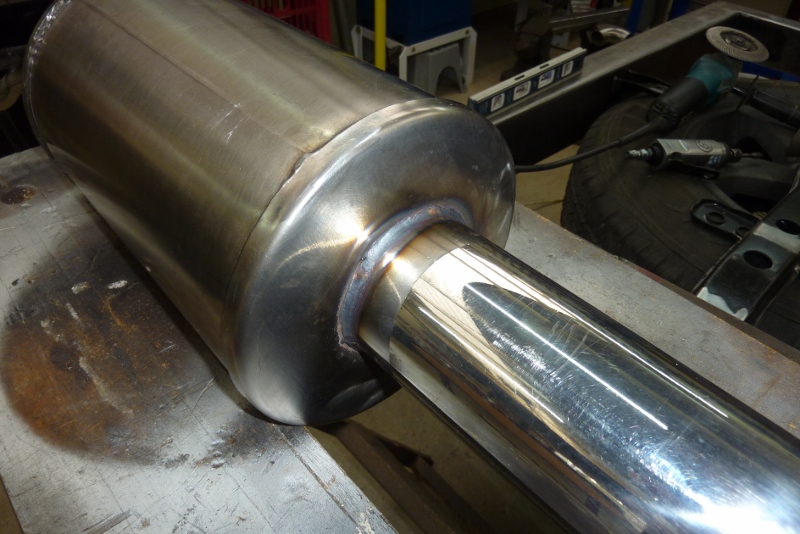
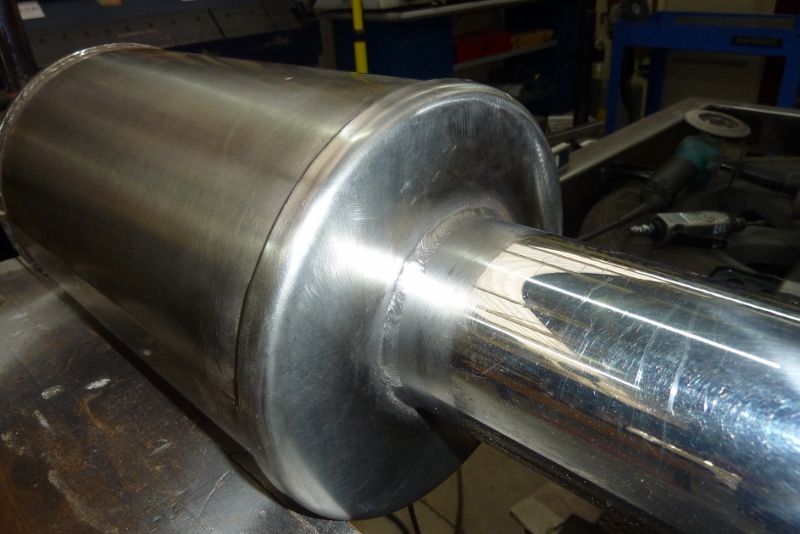
Tigged the join all the way around. Hit it with a stainless steel hand brush to stop it oxidising.
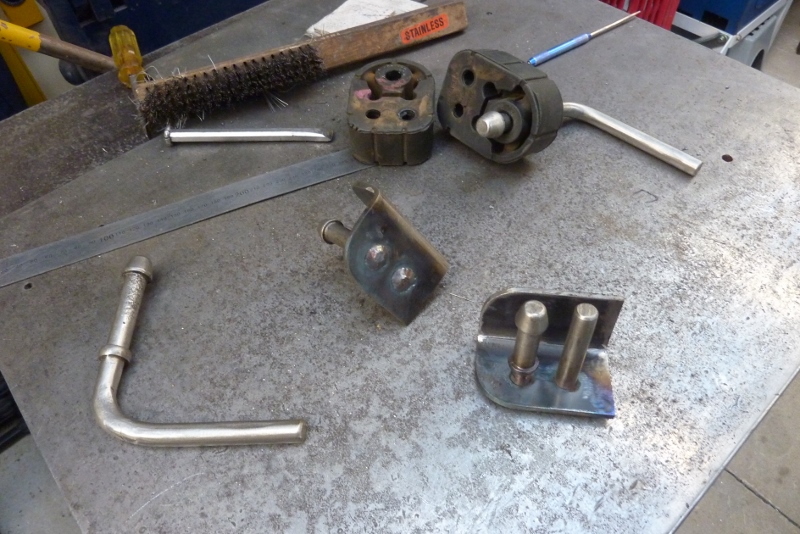
Both done. I also welded up the drain hole so I could rotate the seam to the top and re-drilled the hole at the bottom. Using the original hanger hardware and just folded up a bracket which I drilled for the isolator posts and then tigged them into place.

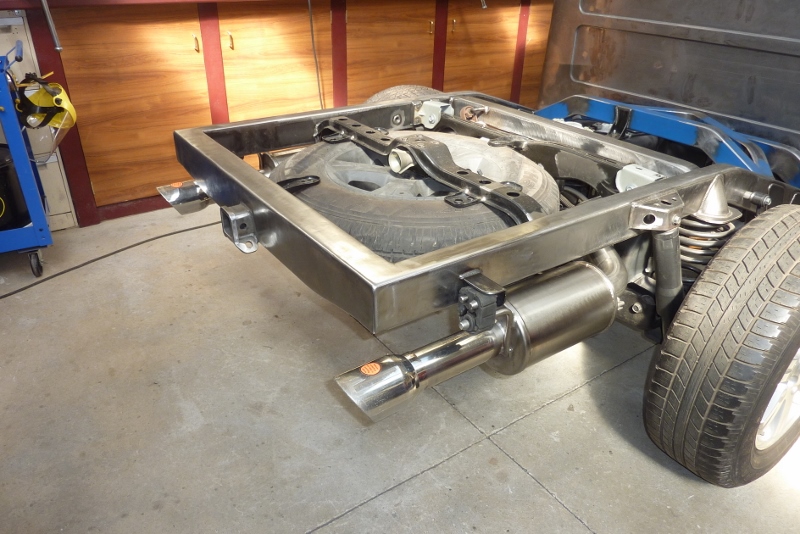
Bracket welded on and all the weight is now on the hangers only. The bed floor is wider than the rails and will cover the exhaust and the frame skirts will hide them from the side. The tips are just sitting there as I don't know exactly how long I need the tailpipe to be yet.
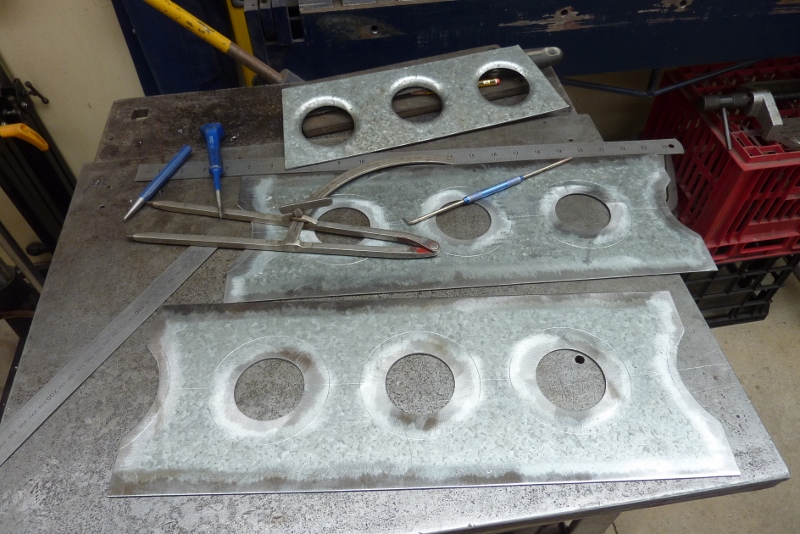
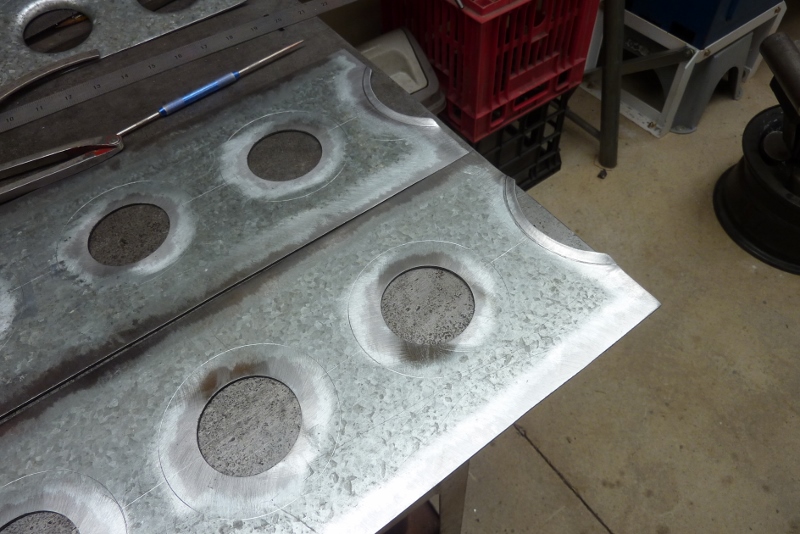
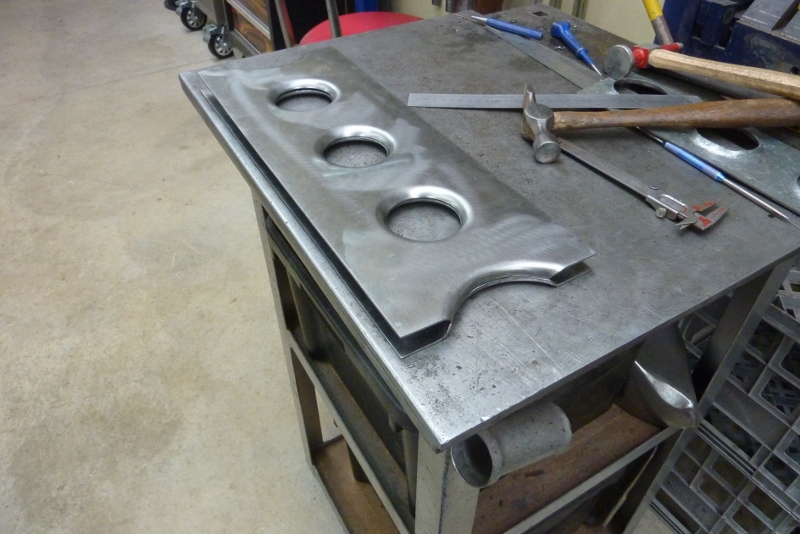
I am making a piece to fit between the two suspension tower braces to stiffen them up some more. I am just using some 2mm-14g cold rolled galvanised steel I had which is the thickest the dimple dies can take. You see the scrap test piece to workout the correct depth I needed to achieve. The ends will also be flared. I broke the fold line using the tipping die on my bead roller. Being cold rolled and so thick I only could go this far.
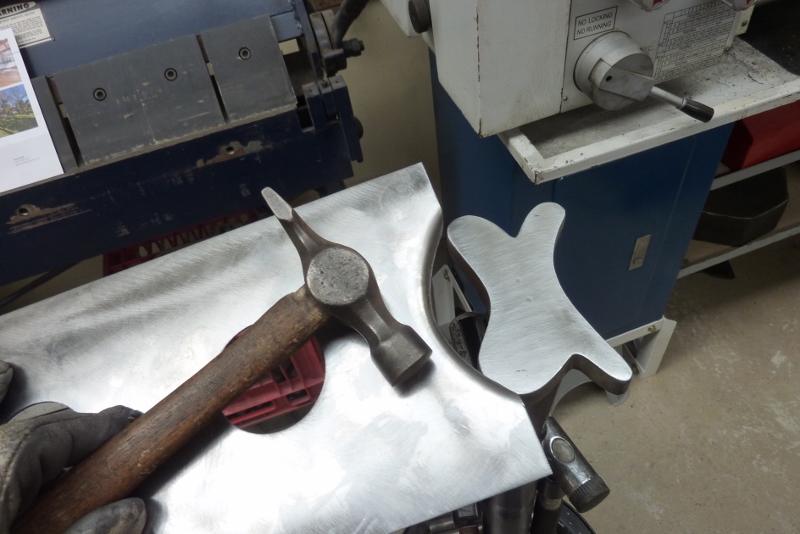
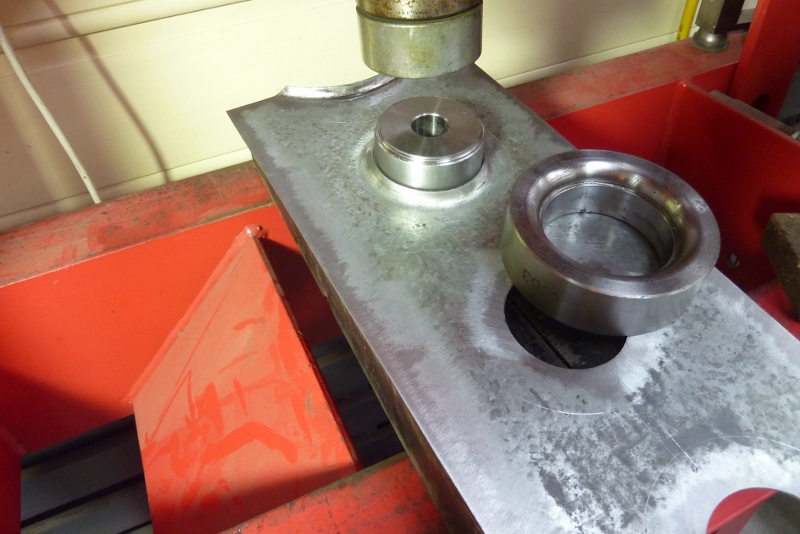
Tipped it the rest of the way with a modified high crown hammer over a stake dolly I had made years ago for this sort of work. I machined a step into the end of the male die to match the smaller hole I am using to get extra flare depth. The female die was lined up with a previously marked line as the smaller hole doesn't allow the normal alignment.
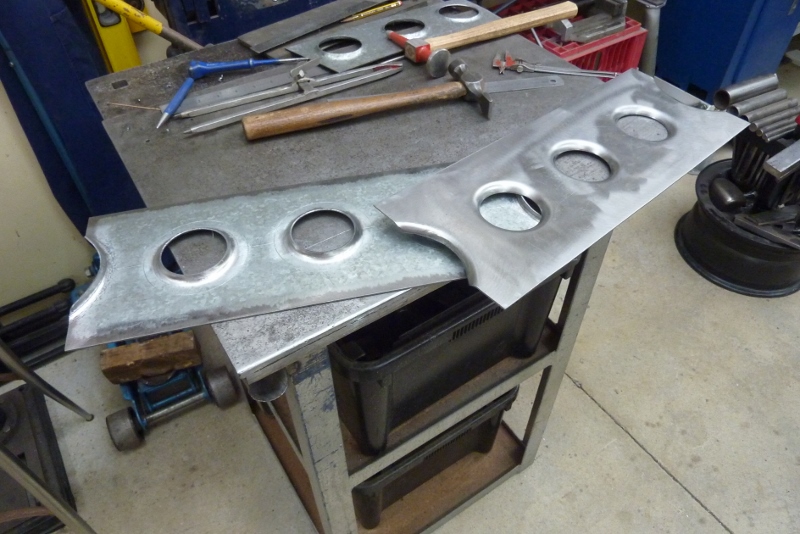
Both pieces ready for assembly. I have them just sitting on top of each other to make sure the gap between them is the same as the centre of the brace where they will be fitted.
[Index]