
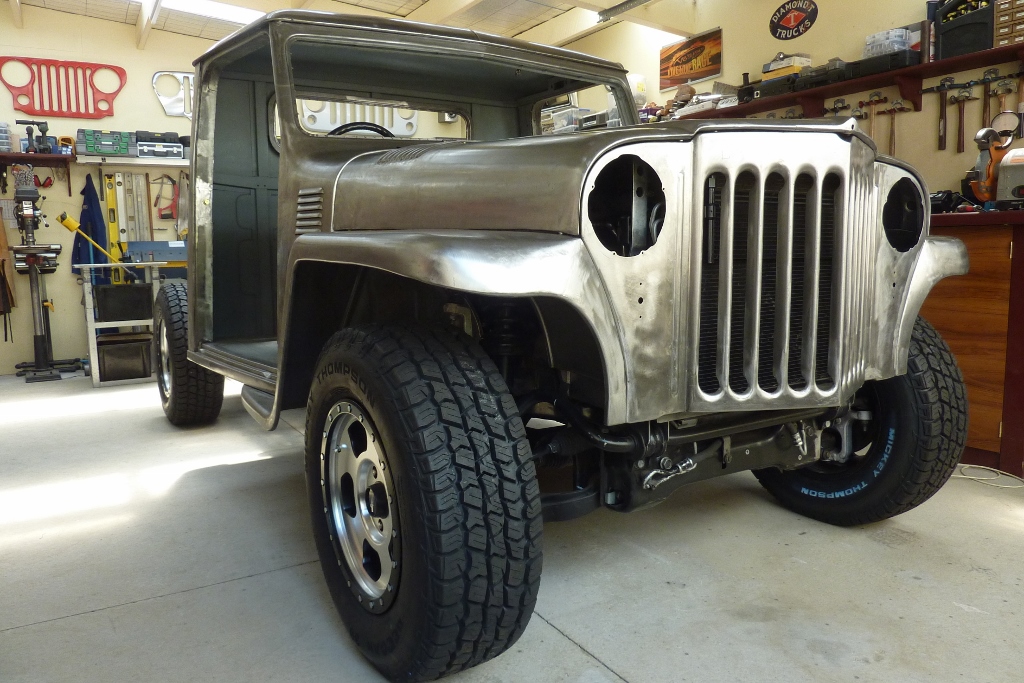
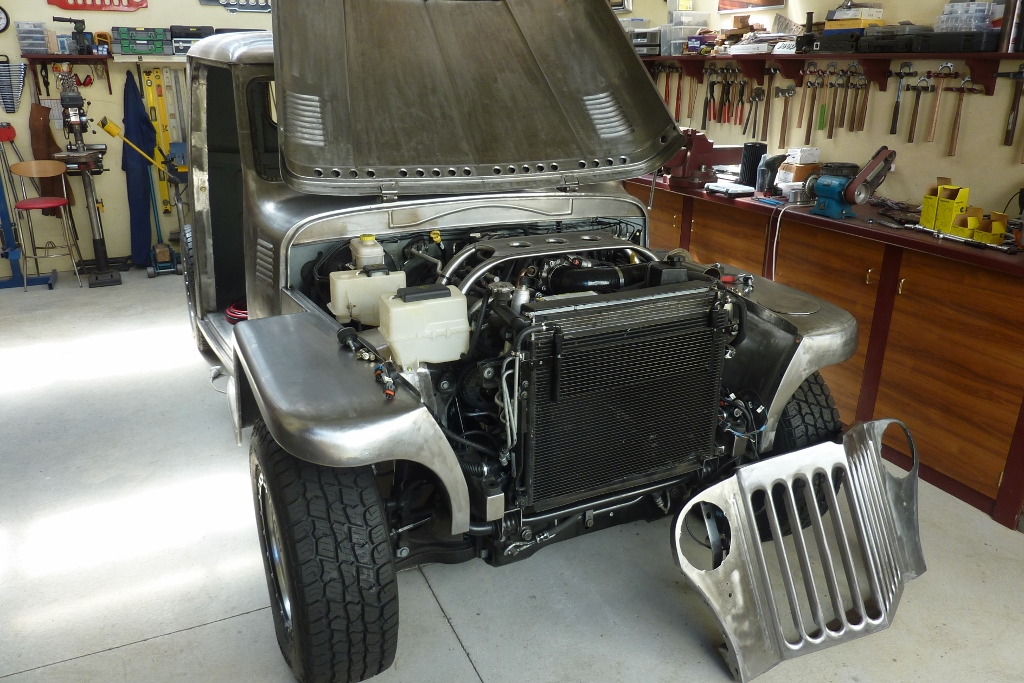
Wanted to see what the wheels and tyres looked like with the bonnet back on. Think the proportions are looking alright. Wouldn't mind some SRT coils though to drop it an inch.
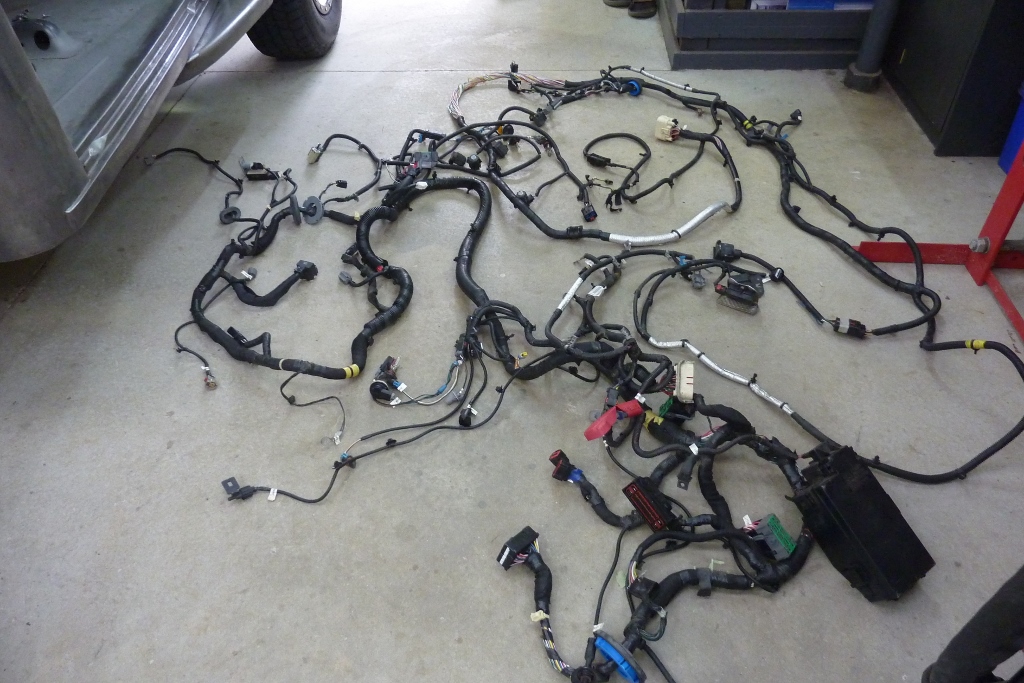
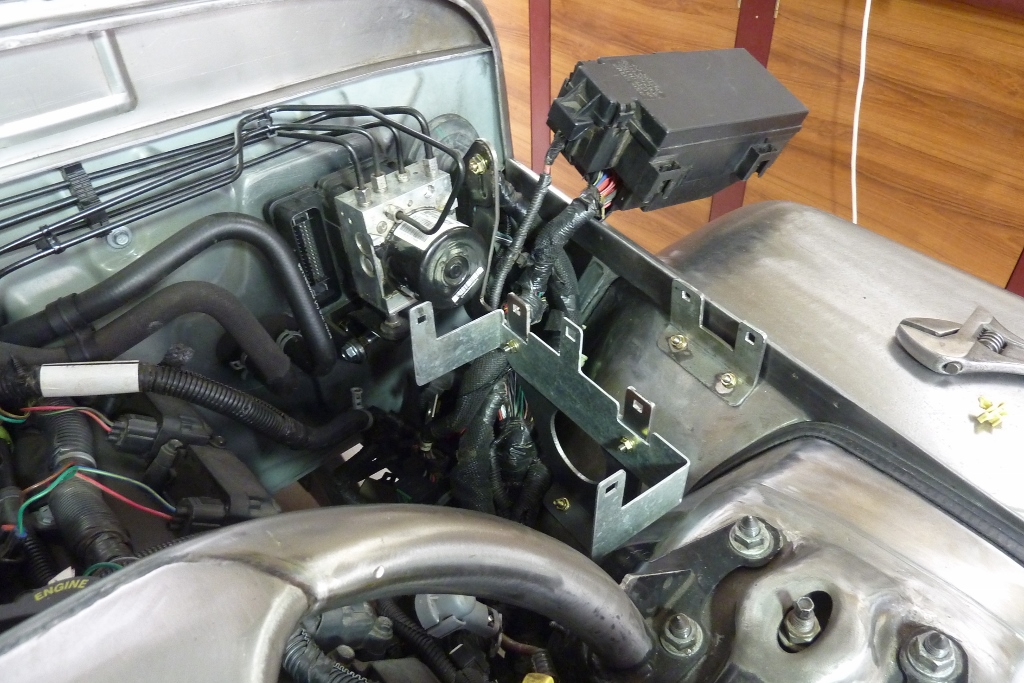
Engine loom was left on so starting with the chassis wiring. Would have been easier if I could place everything where it was on the donor but the suspension towers are 7" further forward and the engine bay tapers to the grille also. These are the mounting brackets I made for the two fuse boxes to clip into.
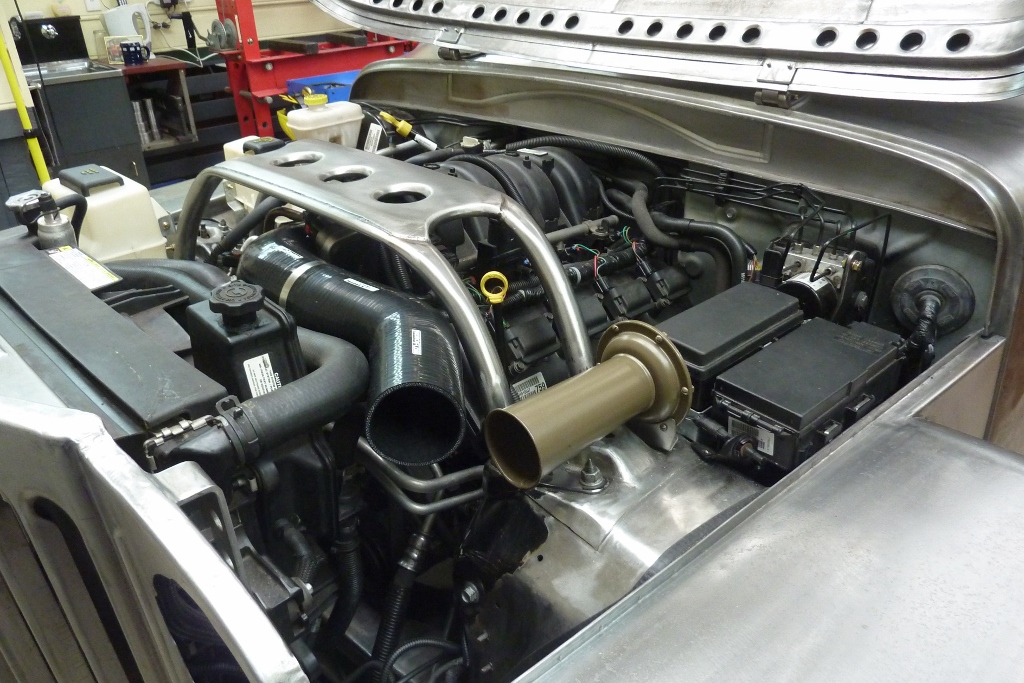
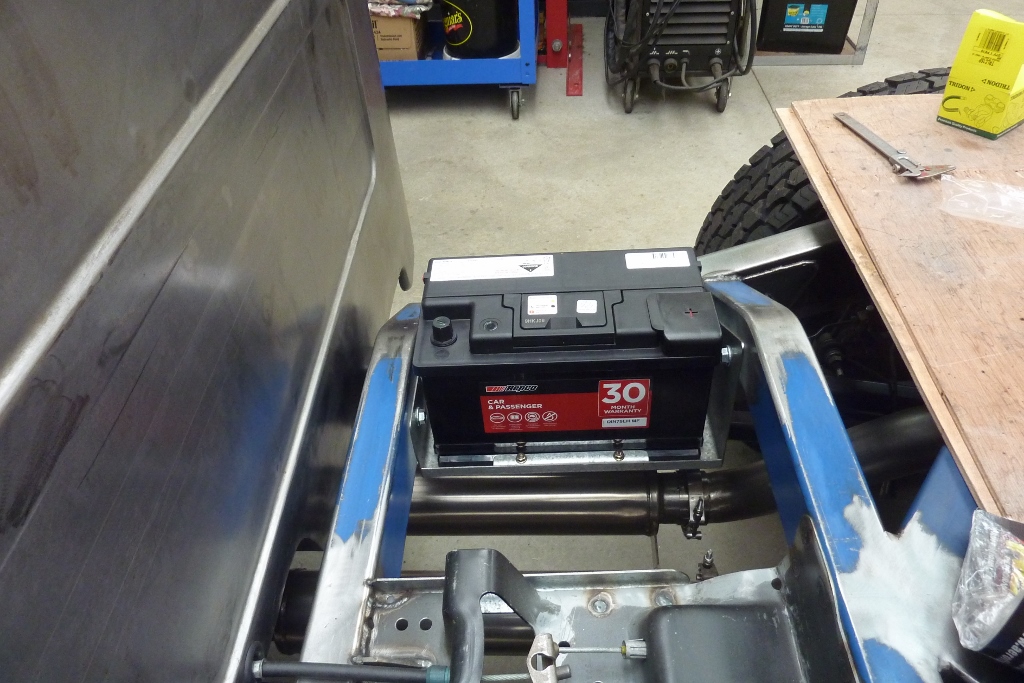
Horn is from a WWII Chevy Bitz Truck. Very loud as running at 12 volts instead of 6 volt. Can see I have made a start on the intake ducting which is all 90mm/3.5". Been waiting for the battery to come on special and saved $116! DIN75LH MF with 910 CCA, 180RC and 90AH.
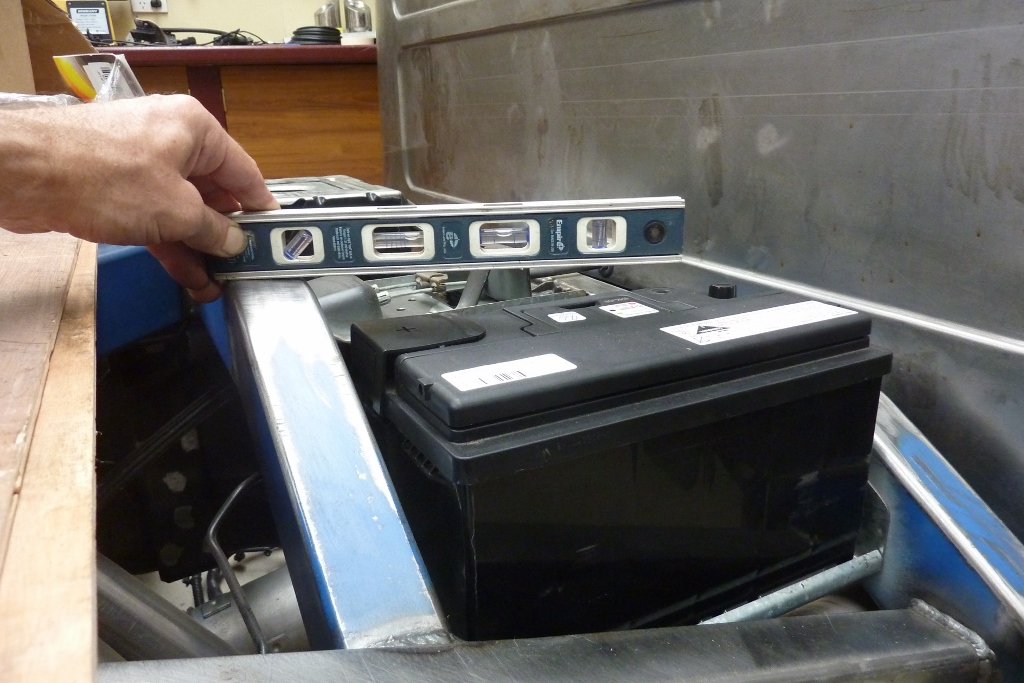
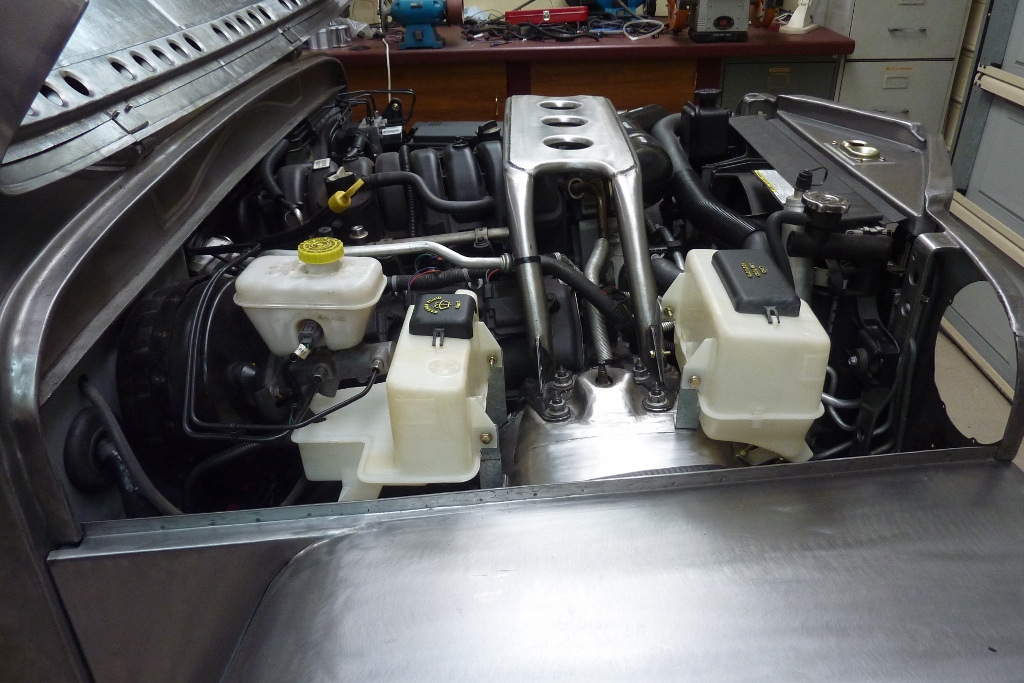
Plenty of terminal clearance to the underside of the floor. Terminals are recessed too. The clamping system works really well and it is very solid. Had a lot of trouble finding a OEM washer and big enough radiator recovery bottles. These came from a V8 Ford Explorer and were one unit. I bought two so I could separate them and mount off the joining webs as didn't fit otherwise. I noticed that OEM always placed the radiator recovery bottle near the height of the radiator cap, so did the same. Expansion bottles that have the radiator cap fitted to them and are therefore pressurised, must be higher than the radiator and the heads.

I would like to introduce my new garage buddy who was exploring the workshop for the first time. We called her Noski which mean 'socks' in Russian which I thought was fitting. Our last cat recently passed at 15+ years old and was also a rescue cat. Grille is out so I can modify it for the new headlight buckets. Fortunately everything else can stay where it is and not have to come out as well, so it is a quick job. The new steel headlight buckets from NARVA, https://www.narva.com.au/products/72193, have a smaller mounting flange than the Willys Truck ones. Rather than cutting out a ring and welding it, I welded a disc in as the extra metal helps with the distortion control. These were welded in without stopping as you can tell by the HAZ.

Welding the disc in also allows any change of position if needed. In this case the factory headlight holes are out by 3mm-1/8" from one side to the other. So I moved the centre point over before scribing the new hole and cutting it out with a jigsaw. I had already planished the welds to make everything flat again.

Once the holes were cut and mounting holes etc drilled, final working of the area was done to make it all flat. Fitted the indicators back in so they could be wired along with the headlights which I am converting to H4 plugs instead of the separate high and low beam sockets that the donor had.
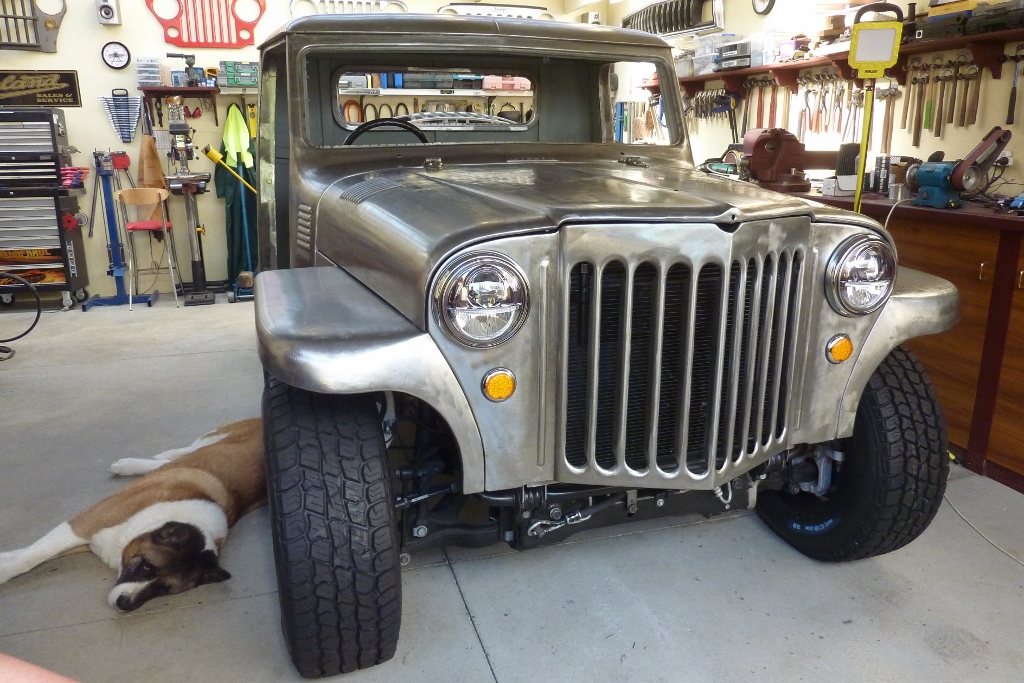

We finally have 'eyes'! I wanted better than halogen so used these LED headlights which fit the old/new theme. Didn't want the bug eyed look of other LED headlights. These are popular on Kenworth Trucks here and were an OEM fitment on the last of the series of Land Rover Defenders. Top half gives a little blackout look to them as well. You can also see why I chose the spacing of the extra bead I added after widening the grille. The space each side of the bead next to the headlight is the same.
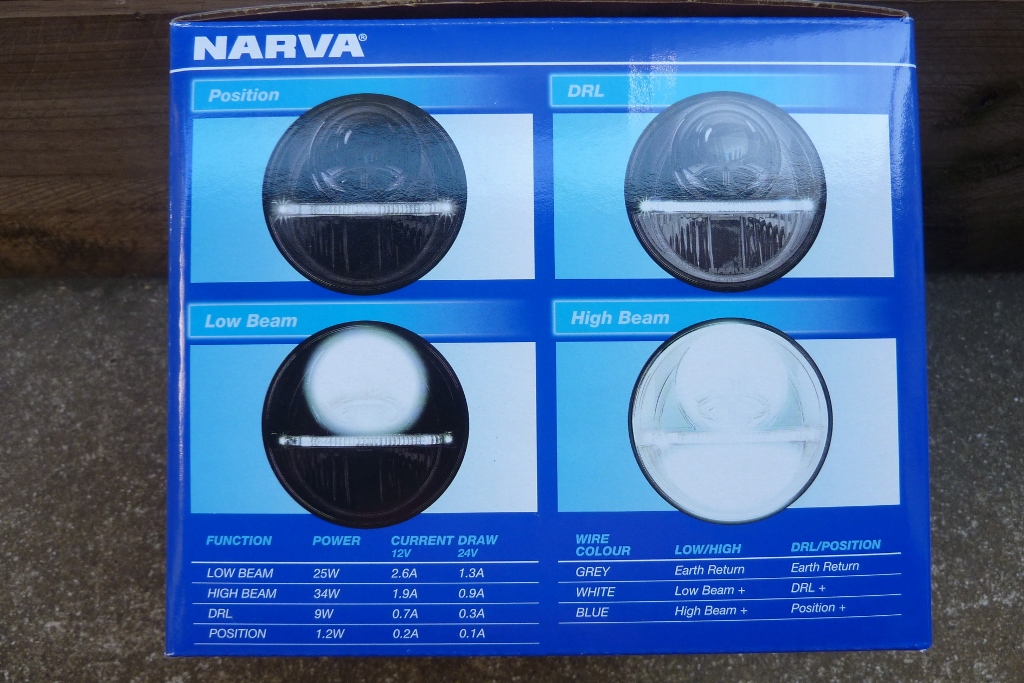
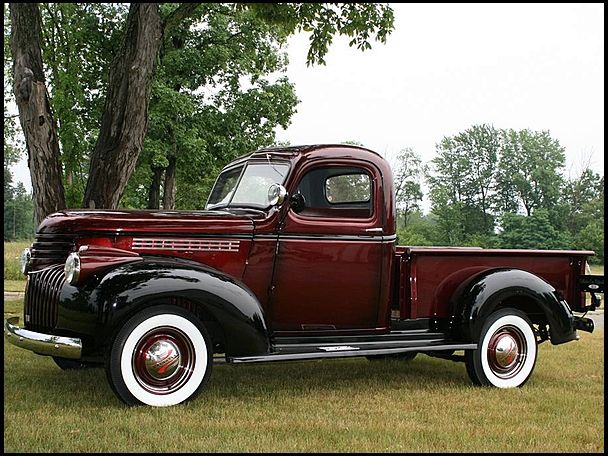
These headlights offer a parking, DRL plus low and high beam. https://www.narva.com.au/products/72104 They also do a version that has no low beam, so check your part numbers. These are fully ADR approved so I will have no problem getting them certified. They are for RHD so dip to the left instead of the right like for the left hand drive market. Made by GiantLight who make LHD versions for other manufacturers as well like Nolden. https://giantlight.en.taiwantrade.com/product/new-7-headlamp-with-drl-po-1497370.html# Also without the parkers and DRL. https://giantlight.en.taiwantrade.com/product/7-bi-led-high-low-beam-lamp-module-570300.html I have just been shown this example of what looks the same as the Mustang Royal Crimson colour I like on an old truck with black guards.
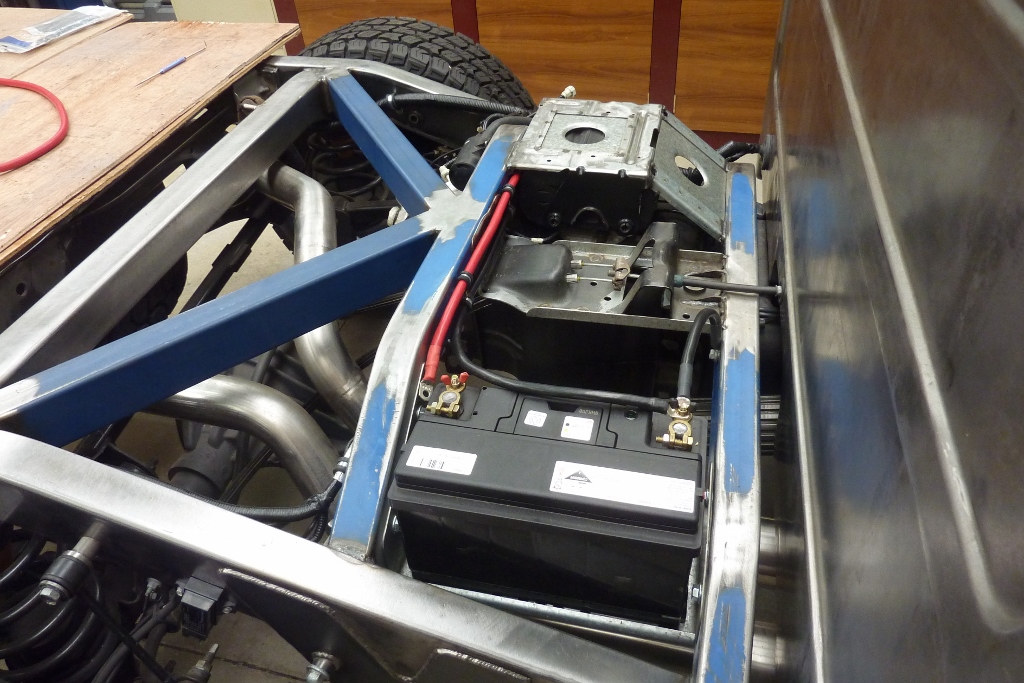
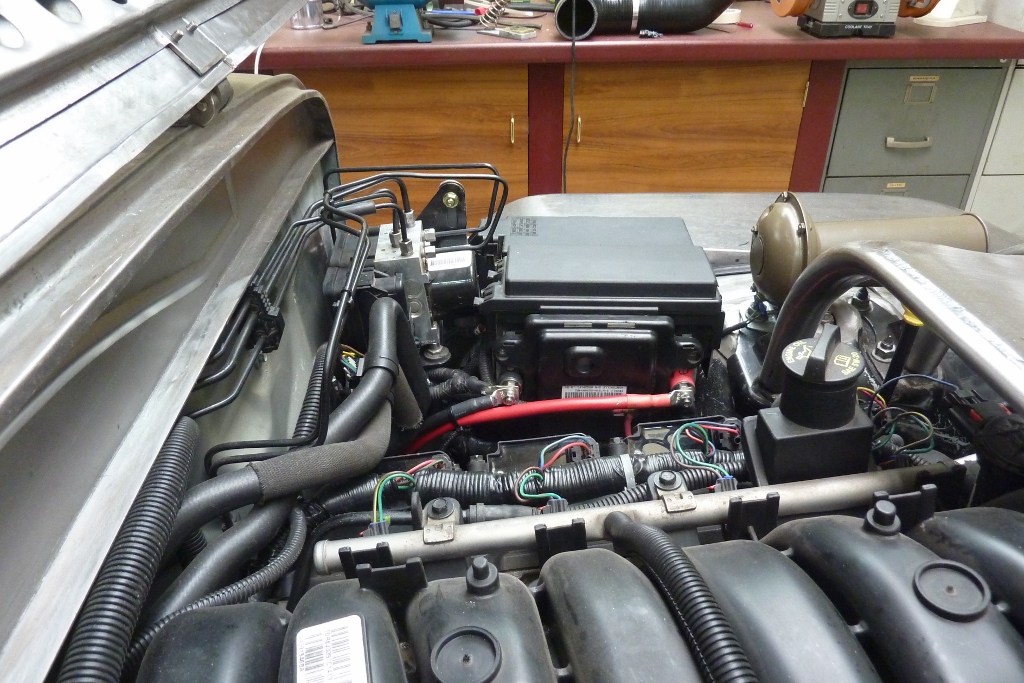
I have wired in the battery in its new location. I used 50mm2 or 0 B&S sized cable so there would be no voltage drop. Added an extra negative cable to the frame as well. I have been using aluminium thread inserts for my negative cable frame and body connections as can easily clean the face of them after painting to give a good contact without rusting. In the engine bay I attached two remote battery studs to the side of the fuse box. The original factory cables could be fastened to them without alteration.
[Index]