
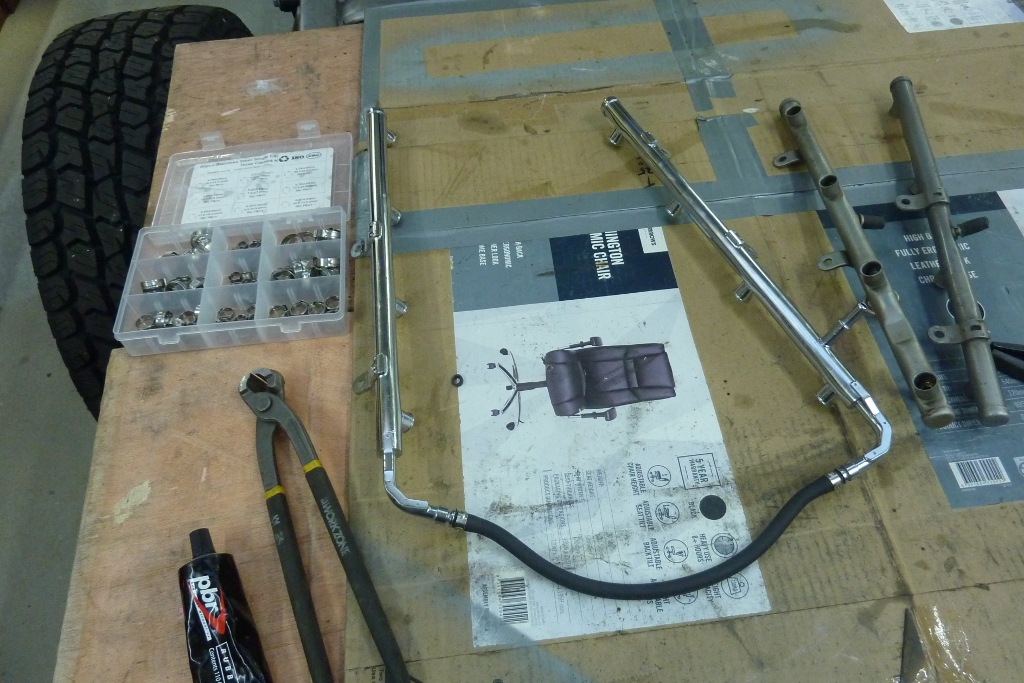
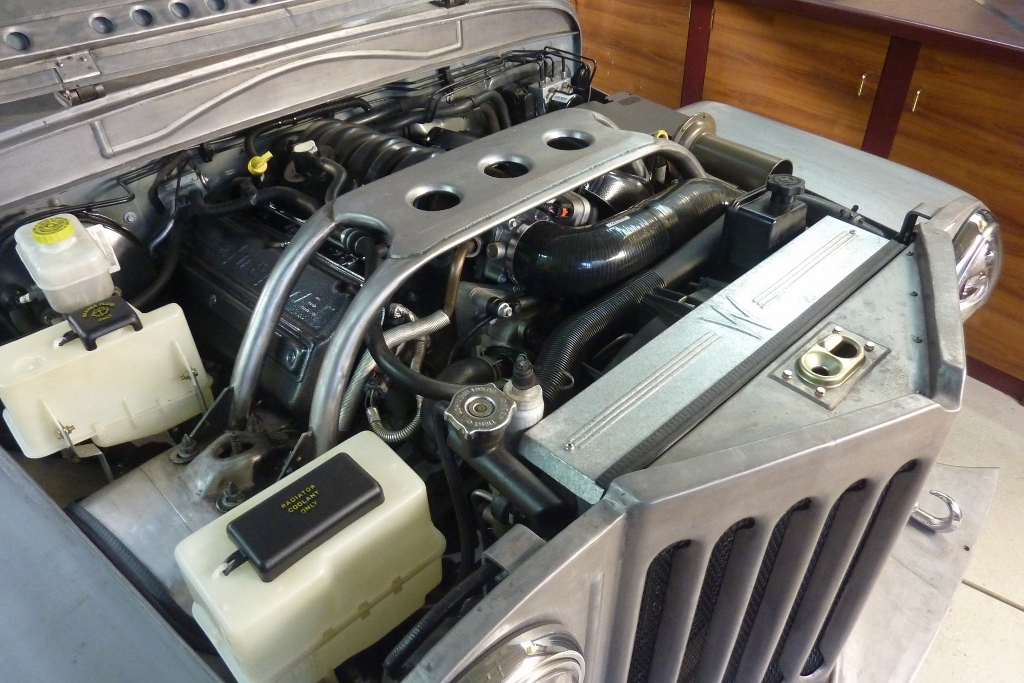
I was was very fortunate that I was given a set of stock fuel rails from a 6.1 SRT HEMI engine as they had changed them for a billet pair from a fellow Ozrodder member Choco. I did a trial fit and the only thing I needed to do was alter the bend an the end of left one in the picture. It was at 90* like the other side originally. Just placed it in a vice with soft jaws and carefully straightened out the bend as shown. They didn't come with the crossover fuel line so I cut mine off just each side of the barb. Even after softening it carefully with a heat gun, I couldn't pull it off the old rails. But my line was longer than I needed anyway so no problem. The line is nylon inside with a rubber feeling coating. I had to put the ends in a jug with the water boiling and quickly push it onto the barb that I had lubed with a bit of rubber grease. Held the rail in the vice so I could use both hands to force it on all the way. I added some single ear stainless hose clamps as well even though the factory didn't have them originally.
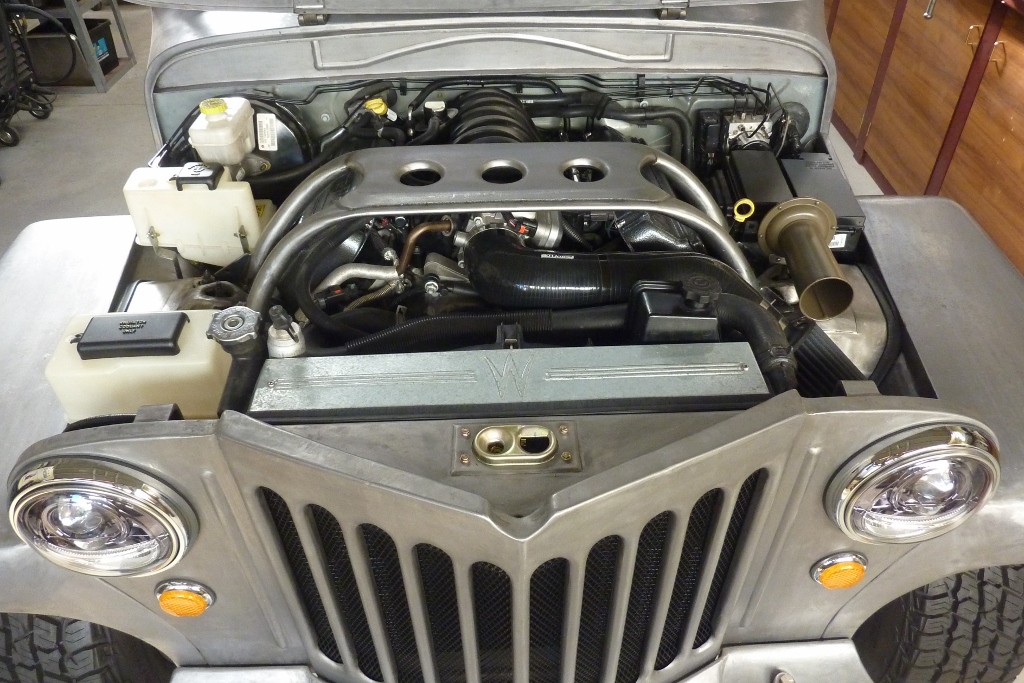
Here you can see why I had to bend the end a bit so the line can pass by the end of the intake runner. The other side was fine and cleared. I had to put the whole line back into the boiling water to get it the flow around back of the intake as it is very stiff cold.
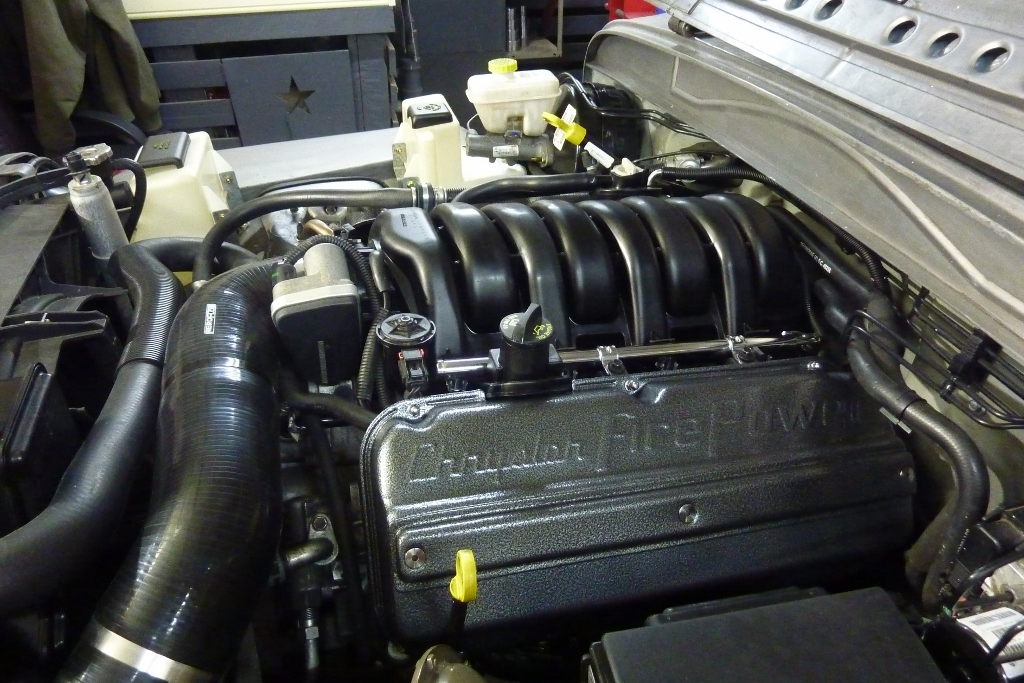
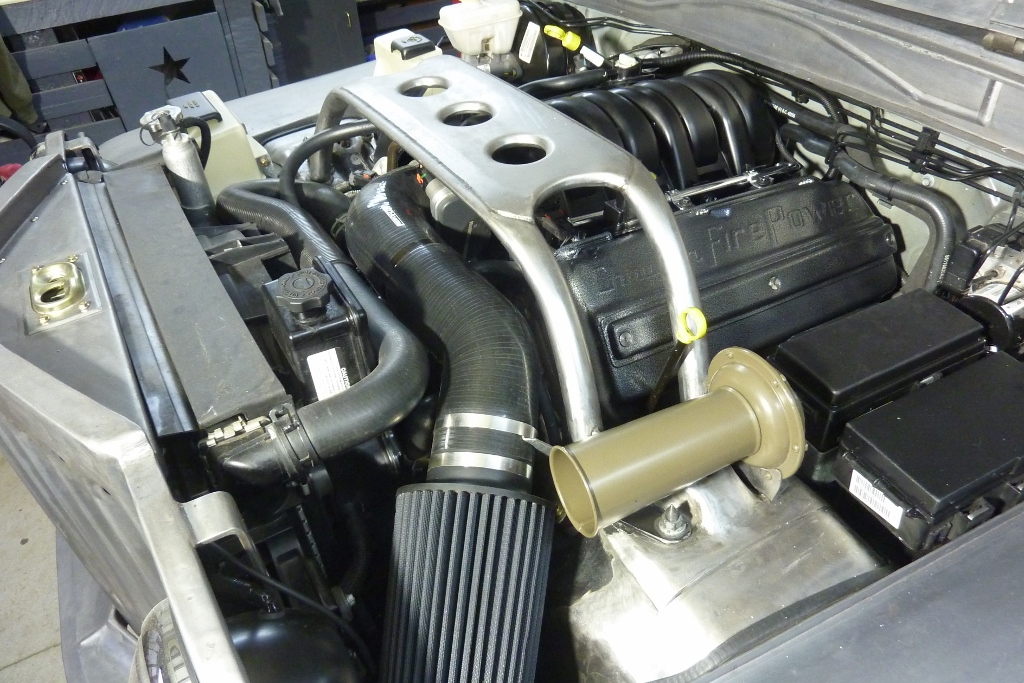
So no crossover line anymore. I also got my coil covers back from the powder coaters and had them done in a Mystic Silver Hammer Tone. I didn't want to look like I was pretending to have an early HEMI, so this gives it a modern twist and has both the silver and black colours they came in. The hammer tone also hides the rust pitting that was left too and this colour choice allows me to leave the intake unpainted as well. Hence why the recent effort into making them look alright without paint. The chrome rails are subtle enough not to be in your face and fit with the stainless acorn nuts and screws that hold the covers in place.

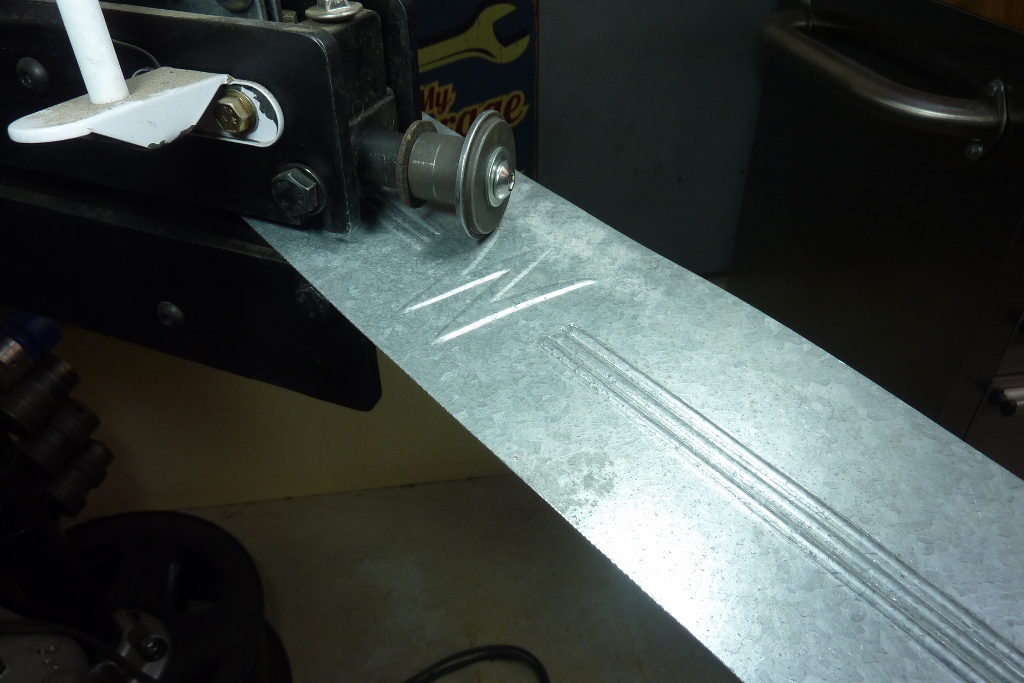
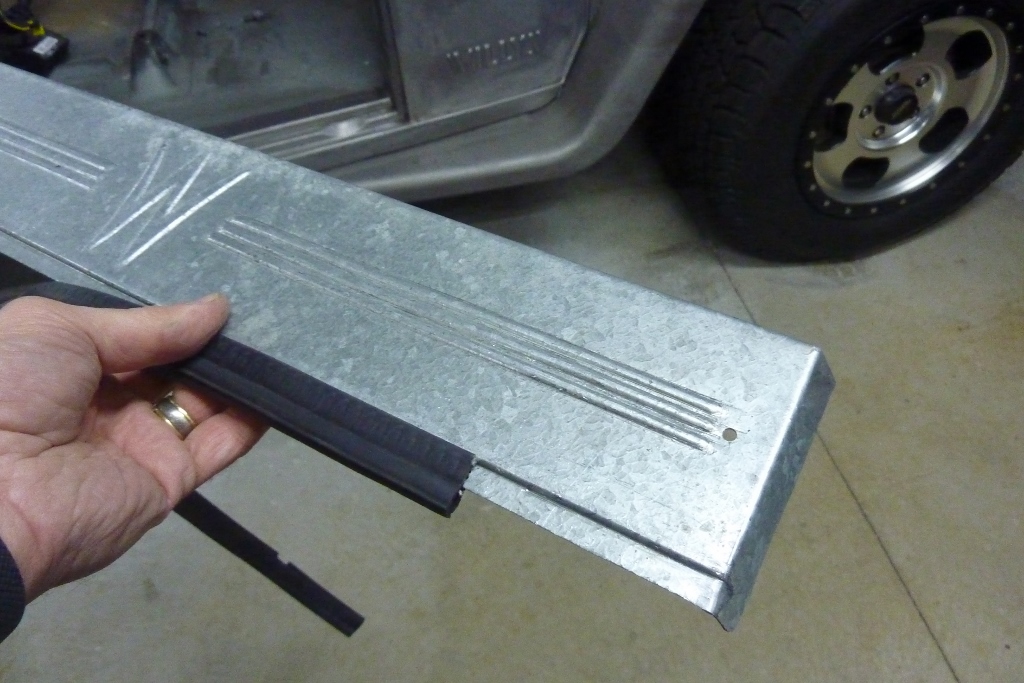
Want to cover what is left after I plastic welded the fan/radiator support together. This was damaged in the accident that wrote off the donor Grand Cherokee. Be good to rid the area of some more plastic as well. Found some old tin that will be good enough for the job. I mainly free handed a 'W' in the same style as the one embossed into the factory tailgate.
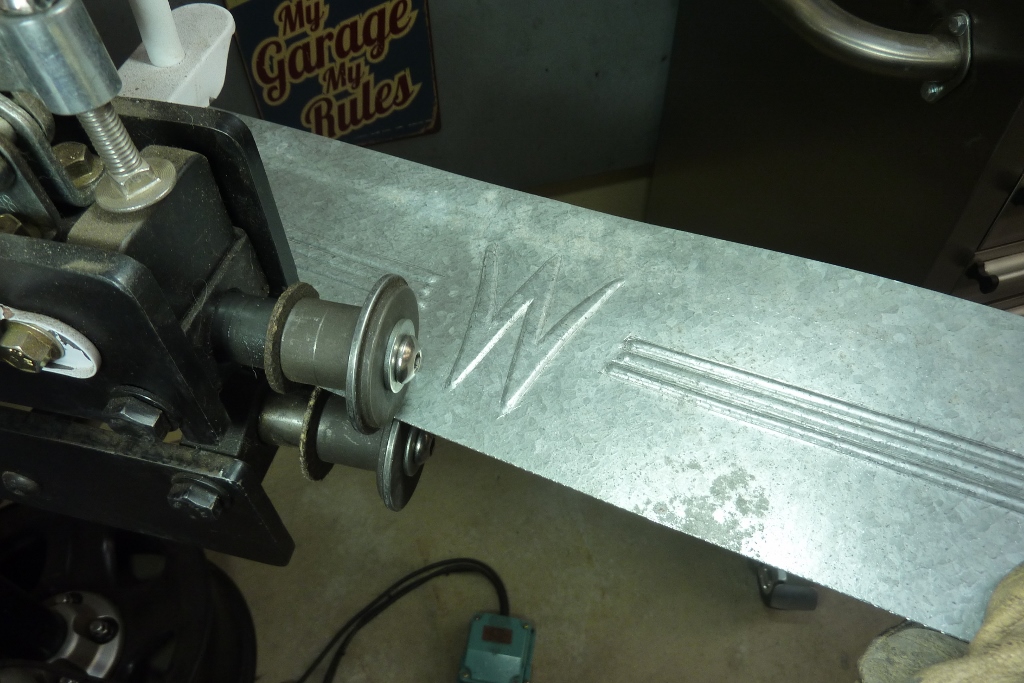
Using the art dies that came with this Eastwood roller. Strangely they are slightly too narrow so that the end bolts don't have pressure on them. Only then relying on the grub screw which I don't like. I found the bosses from old 5" and 9" cutoff and grinding wheels have the right diameter to make good spacers. I was going to add the 'O' behind the 'W' as well but quite like the simplicity of this. I didn't have a bead die small enough for the bead lines each side, so used the art dies for them as well. You just have to turn the piece around and run back over itself again to do the other side of the forming the bead. I also put a joggle in along one edge so some pinch rubber sat closer to flush and stiffened up the edge as well.


As I didn't do any pre-stretching, I had to do it post rolling. It is too hard to judge the perfect amount of stretch you need anyway before hand. I hammered each side of the bead work as well as from the other side using a bolster to get the stretch it needs to have it all sitting flat and without any twisting. Just hammered the screw driver to stretch around the 'W' and round the ends of the beads etc.
Think it looks better than the damaged plastic and adds a little styling touch while tidying up the area. Not sure if I will have it painted satin black like the rest of the engine bay, from the pinch weld down on the firewall, or do it body colour? But for now at least, everything is pretty much done in the engine bay as everything has been wired and plumbed too, as far as I know.


I will be running the donor steering wheel as it has all the stereo, satnav, information screen and cruise controls etc on it. Never been keen on the amount of beige on the Limited's steering wheel. Thought first to just dye the non-leather parts to match the dark slate colour that the top of the dash is etc. You can see a piece of it on the left spoke.
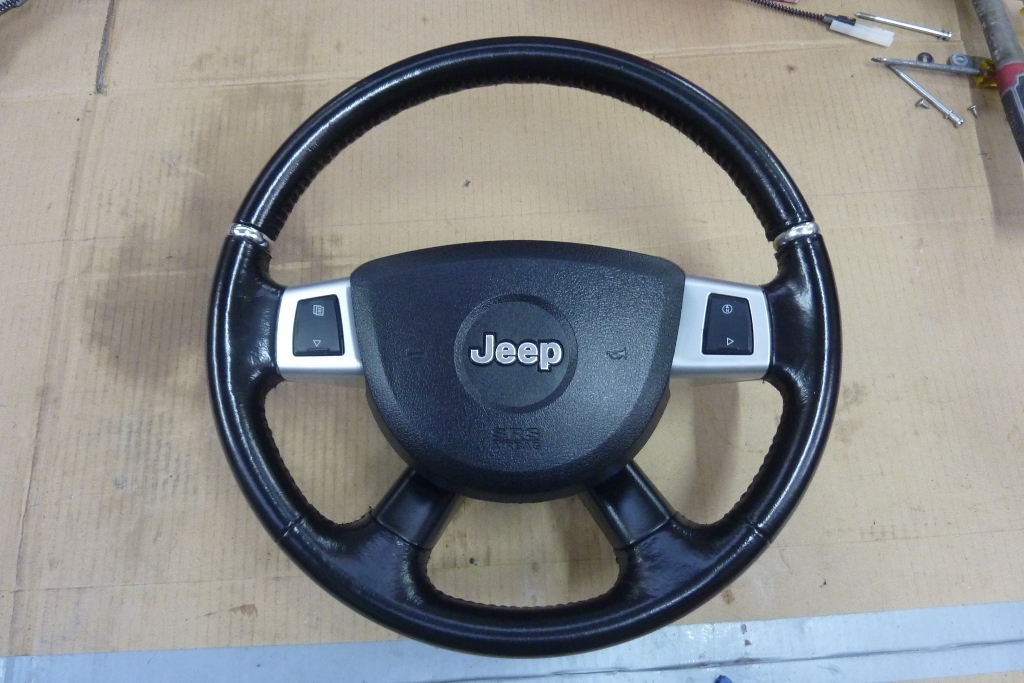
In the end I just went all satin black instead to match the top of the steering wheel. The beige was also really hard to clean as showed up everything, so might as well get rid of it all. I could have gone all dark slate grey too like my 2010 Jeep KK Cherokee, but went the black like some of the SRT versions. Black supposed to be slimming right!
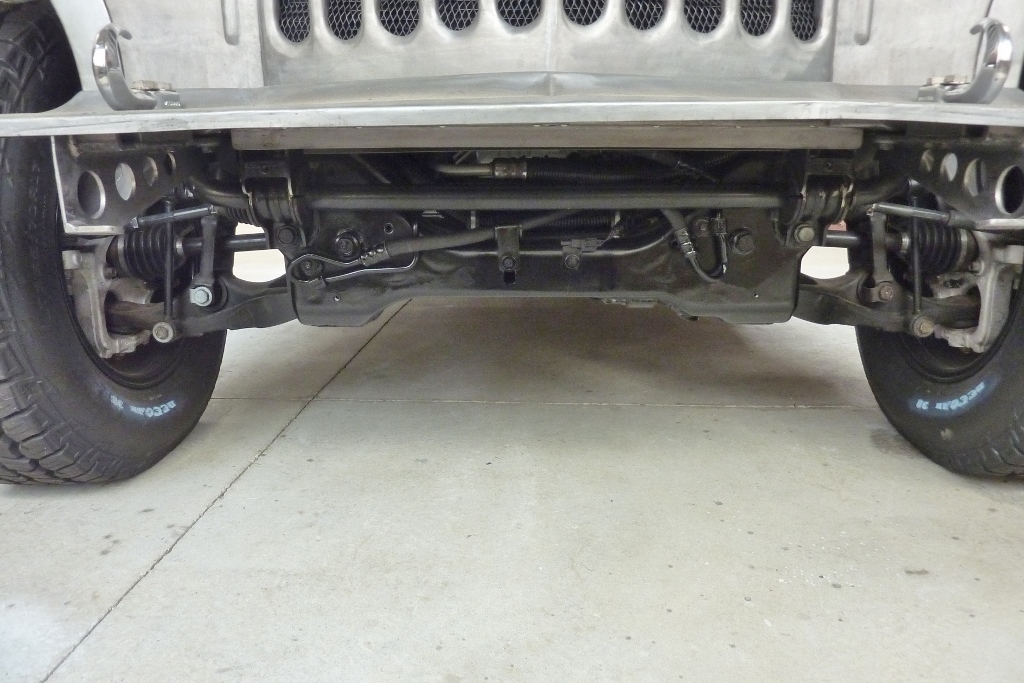
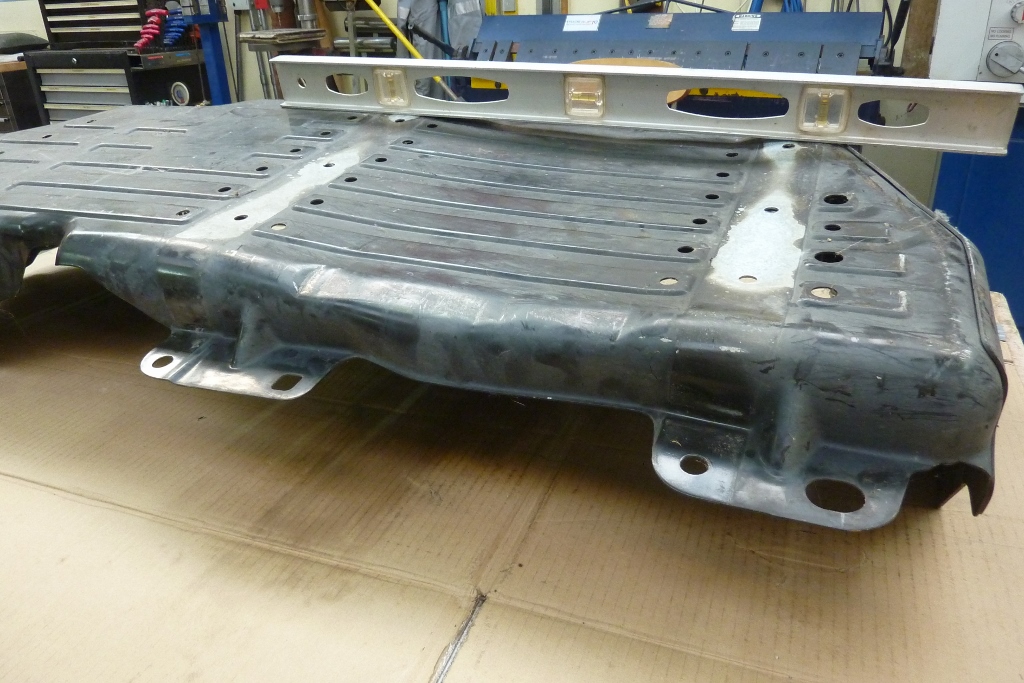
Another thing that has always annoyed me was the exposed fan to steering box lines and hoses. I thought about shortening them but noticed it was on the Jeeps with the hydraulic fans as a way to isolate and vibration being transferred to the steering box. Not for cooling as one would think as it already has a separate cooler and would have been all done in hard line at the very least if so. Even though this is all the same as stock, having a shorter bumper than the donor makes it more obvious and vulnerable when offroading. I still had the damaged fuel tank skid plate where they had used a fork lift at the auction yard to move the Jeep around. Thought I could straighten what I need and make the guard from this.


I just used one section from it and flipped half of it over to make it long enough. Thought with the pressings like this it looked more 2008 OEM which the rest of the drivetrain is from. Think that offers some good protection and looks better too. I left to area above the cross-member open as it is behind the bumper and want the airflow over the engine sump.
[Index]